


Birthday crafting Card making Die cutting How to Party makes Stamping Techniques Card Making
Use dies to make stamps from craft foam – Colette Smith shows you how!
Most of us have basic-shaped dies in our stash, but it’s likely you’ll also have a broader range of motifs like hearts, stars and even balloons. Which is handy, because you can actually use any basic outline to create foam stamps. The nature of the material gives a lovely texture to your stamped images and they can be used several times over! Get to grips with this timeless technique by following Colette Smith’s easy tutorial below.
You Will Need:
Dies: Lawn Fawn Party Balloons, Sugar Pea Designs Stitched Scalloped Rectangle
Ink pads: Ranger Distress Mermaid Lagoon, Twisted Citron, Wilted Violet; My Favorite Things Extreme Black
Stamp, sentiment
Fineliner, black
Craft foam
Gems, silver
Adhesives: glue, double-sided tape
Die-cutting machine
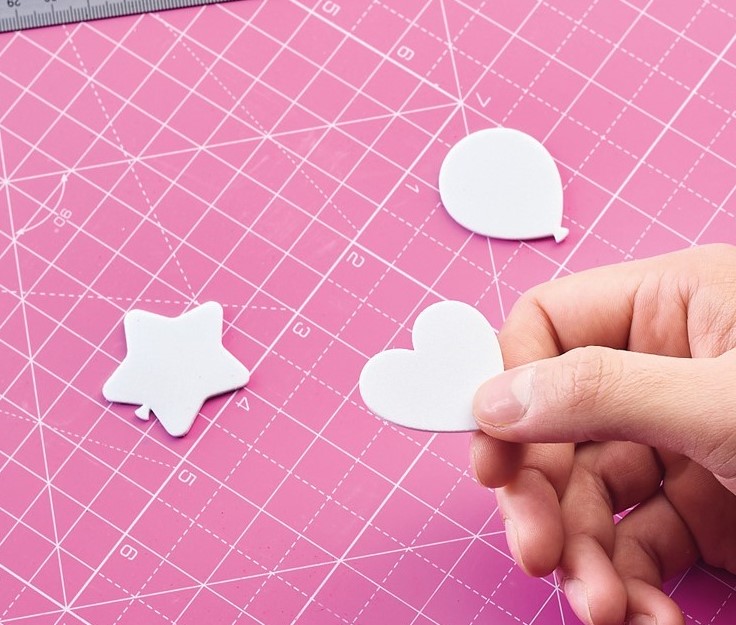
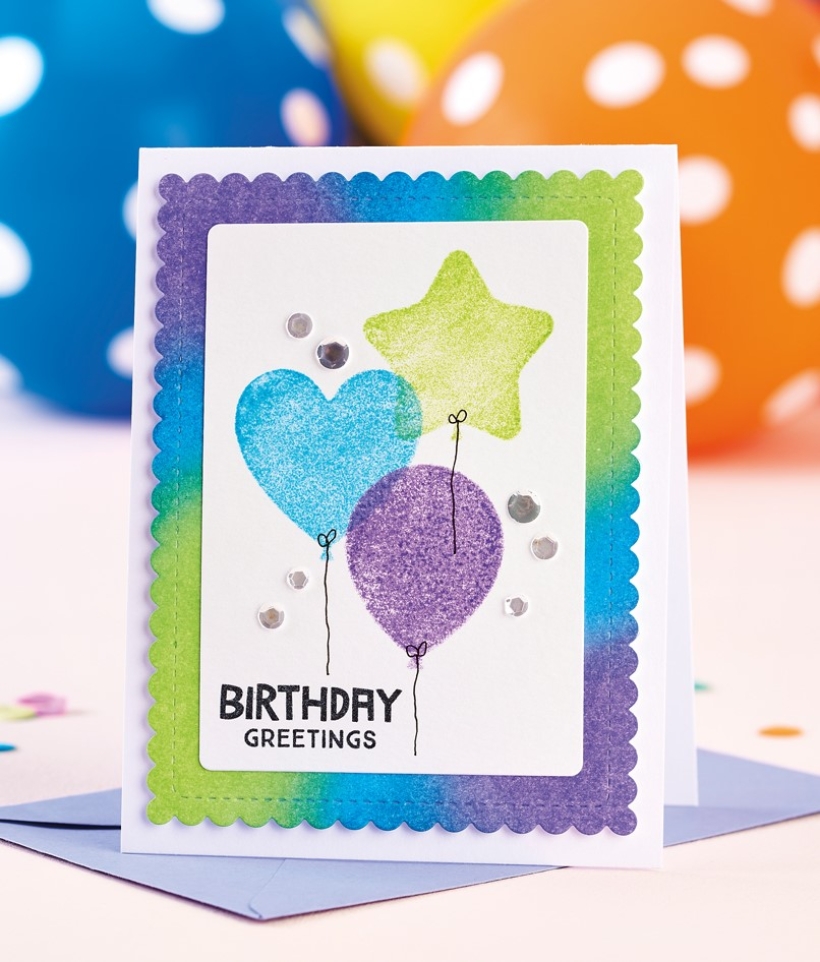
1. Die cut three different shaped balloons from craft foam
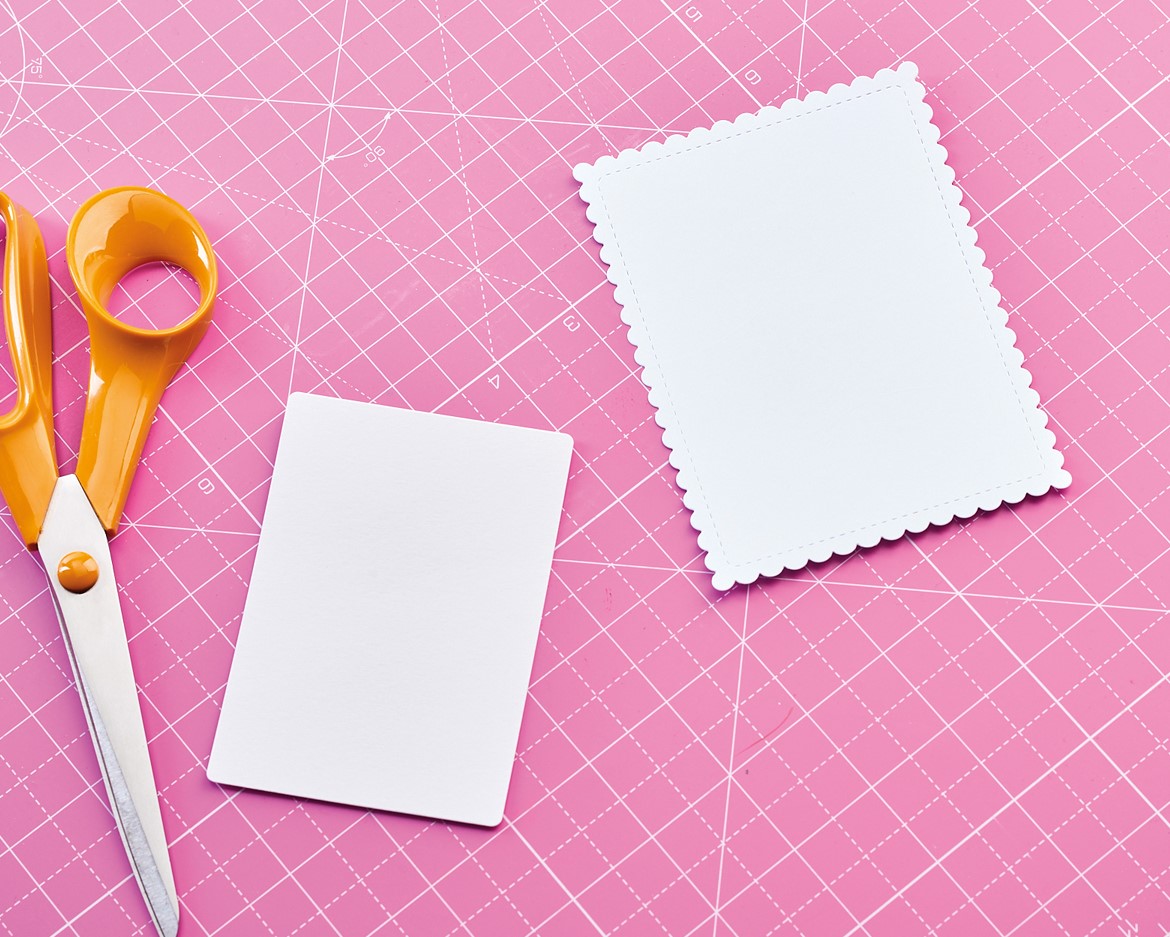
2. Die cut a scallop-edged rectangular panel and a smaller rectangular panel from white card
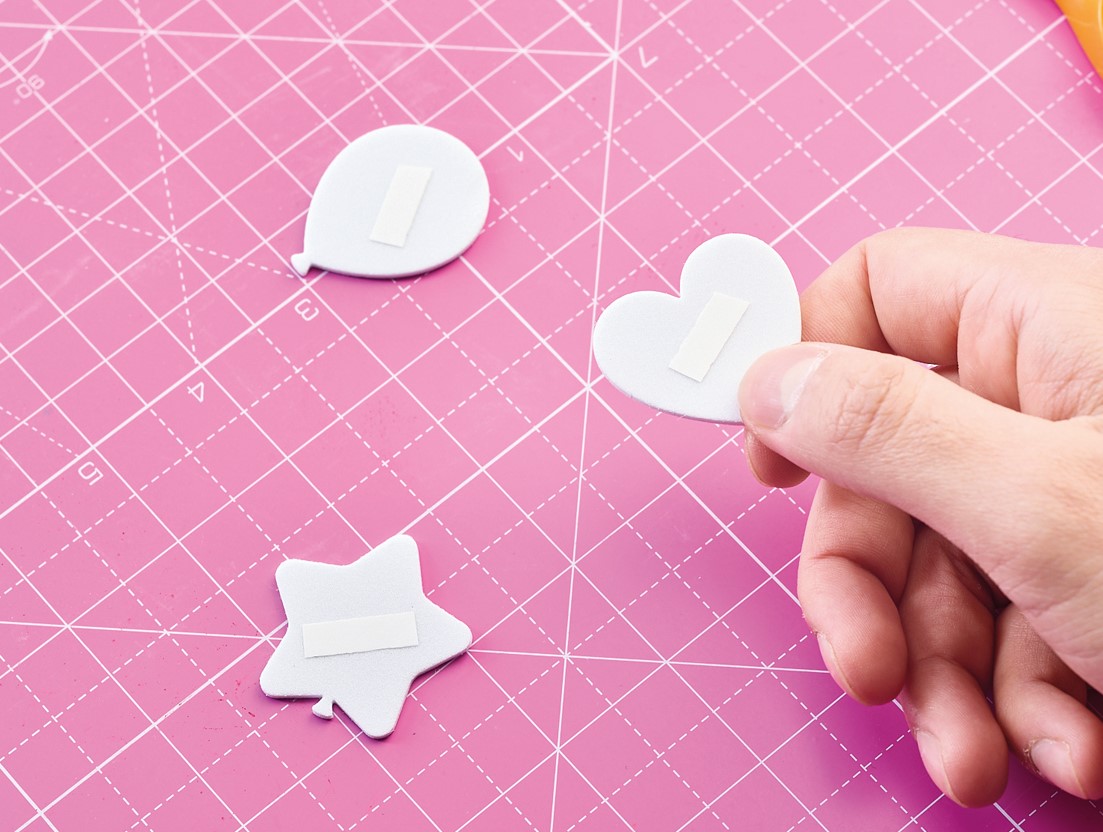
3. Add double-sided tape to the back of each balloon. Fix the star to an acrylic block and apply green distress ink
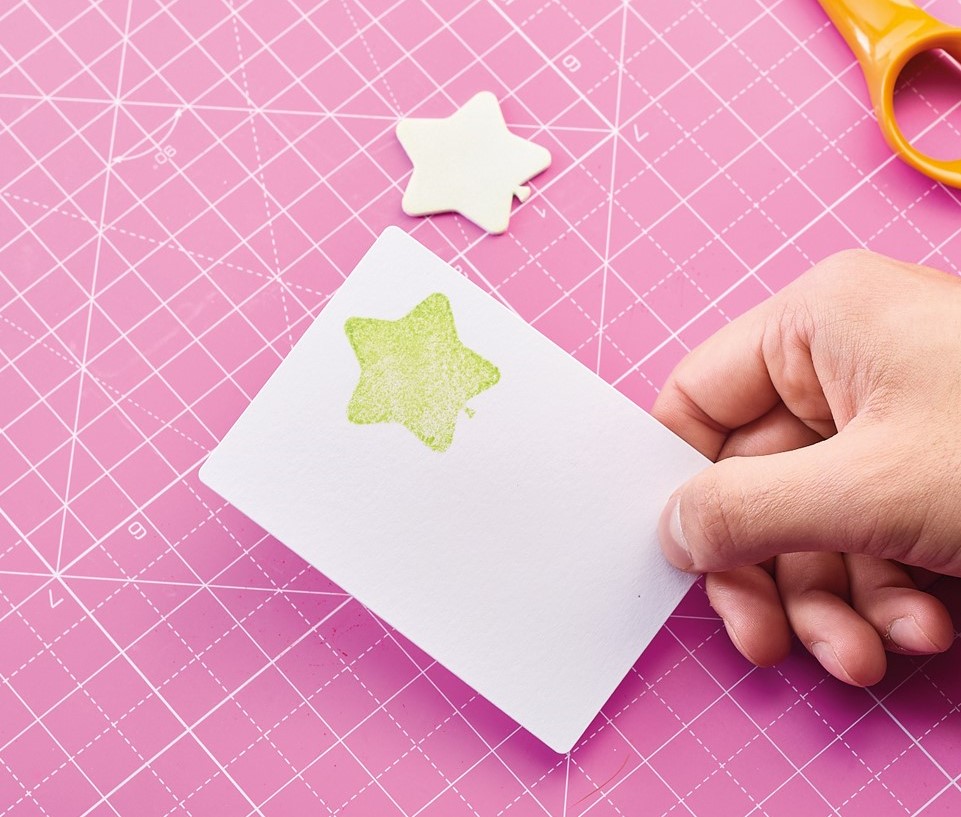
4. Stamp the star balloon in the top-right corner of the smallest rectangular panel, applying even pressure
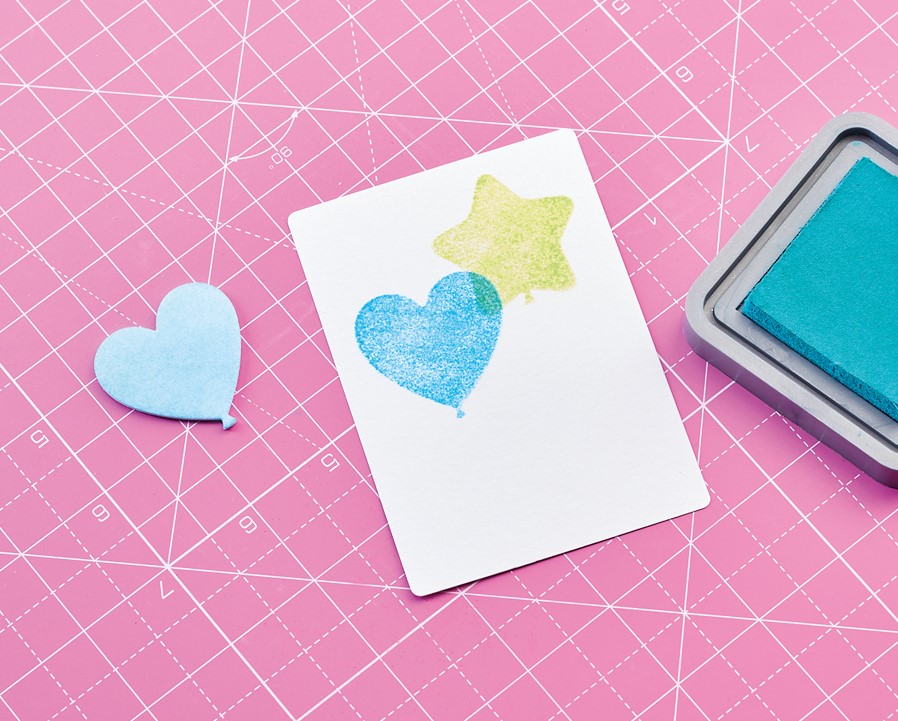
5. Repeat the inking process with the heart balloon, this time using blue distress ink. Stamp onto the panel, overlapping the star balloon slightly
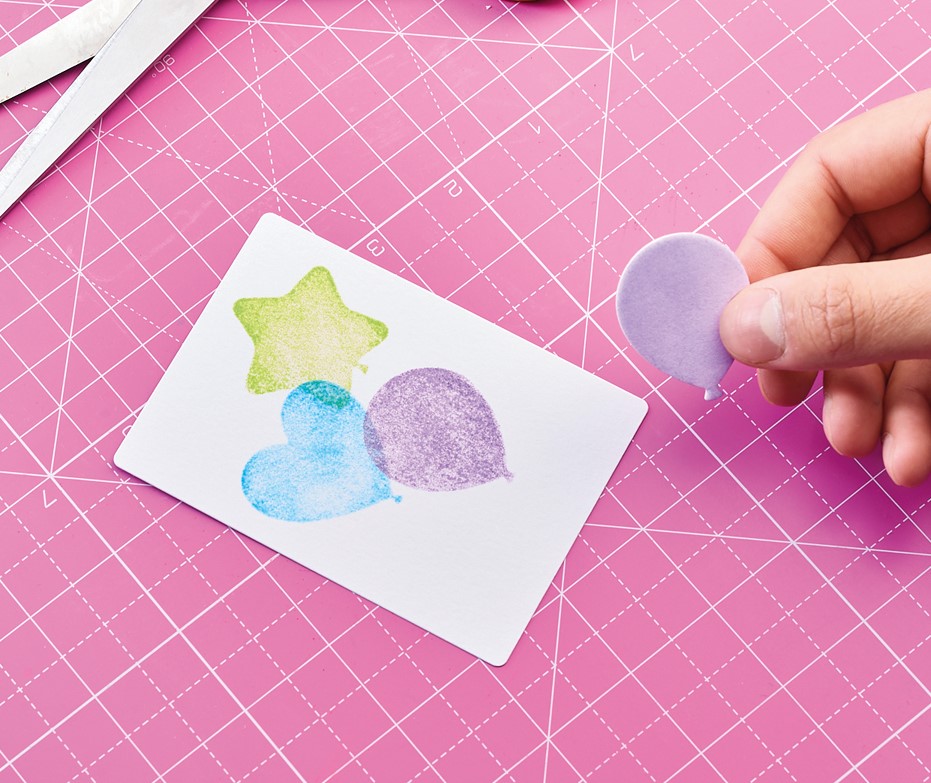
6. Colour up the last balloon with purple distress ink, then stamp onto the panel, overlapping the heart balloon slightly
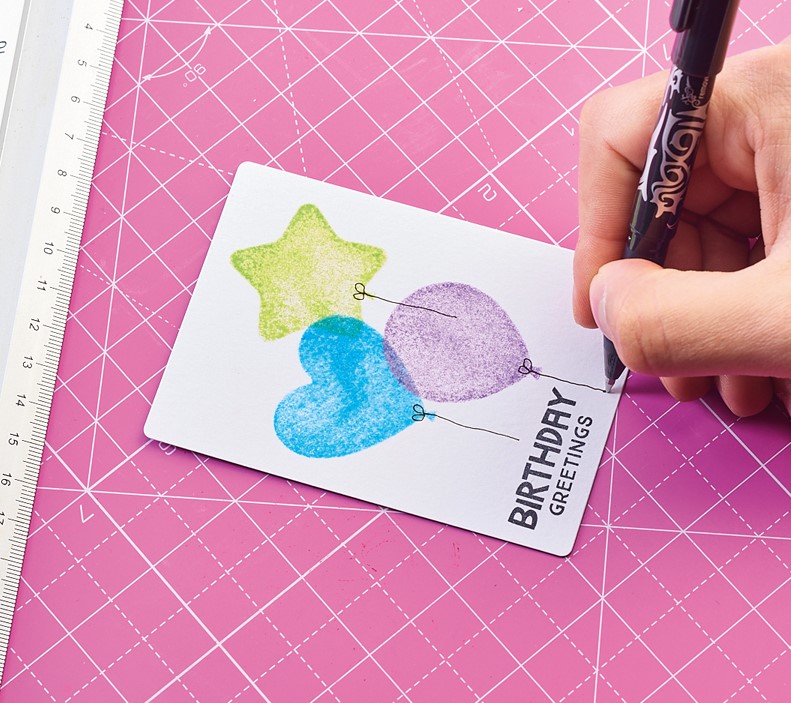
7. Draw strings for the balloons with a black fineliner, then stamp a sentiment in the bottom-left corner
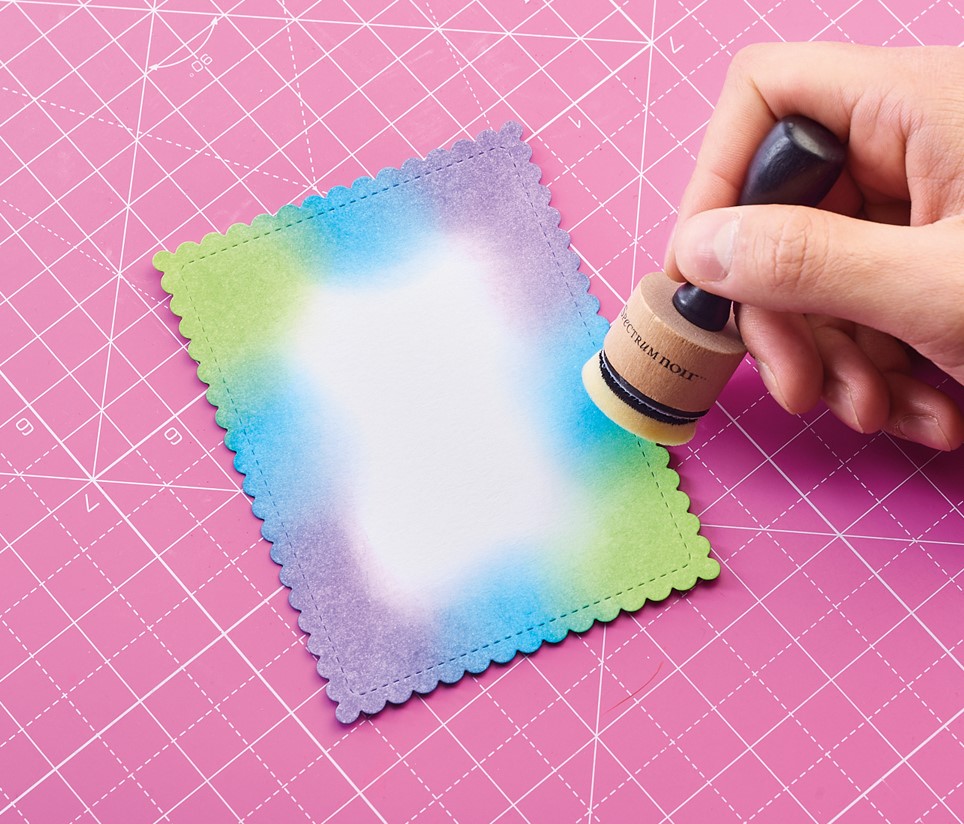
8. Blend green, blue and purple distress inks around the edges of the larger scalloped-edge panel. Leave to dry
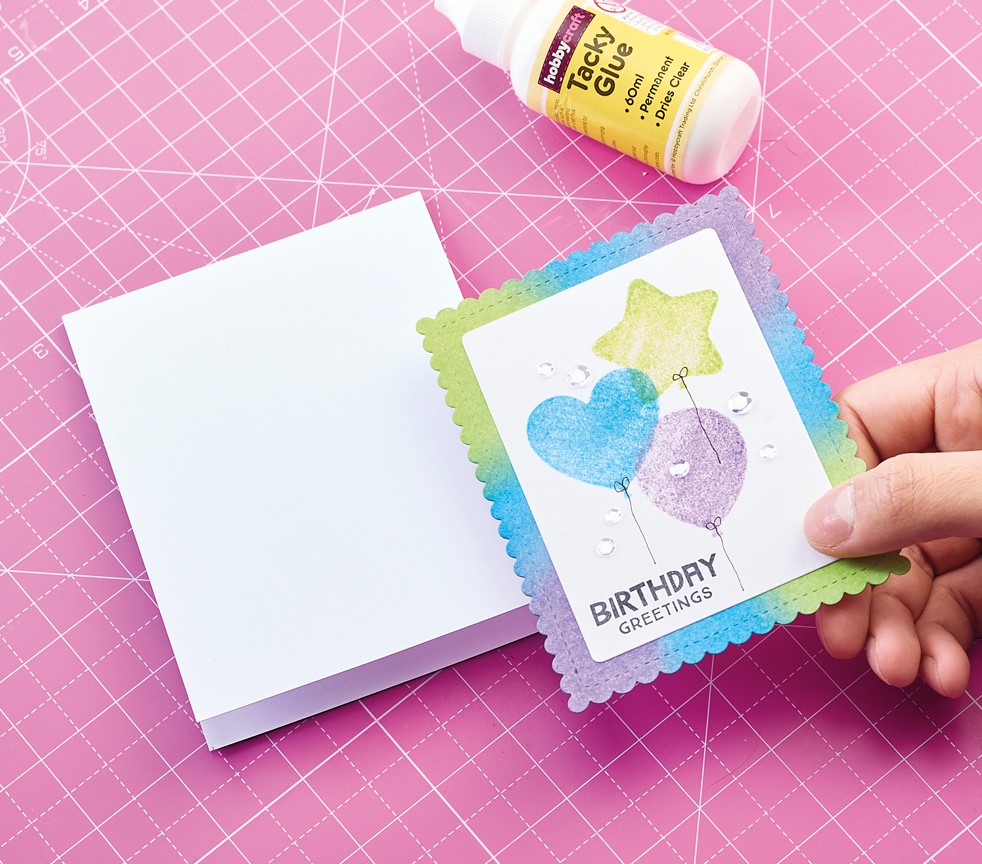
9. Matt the stamped panel onto the inked piece, then layer onto a white 10.5cm x 15cm blank. Embellish with silver gems
“For a more solid and even impression, stamp a couple of times. A stamping platform makes this infinitely easier!”
Colette Smith, designer

Busy lives often involve a lot of memos and reminders, and it can sometimes be hard to keep track. Luckily, we’ve got a sophisticated solution to keep your desk tidy and…

If you’re having a quiet Valentine’s with your beloved at home this year, make the place look a little more special with a speedy-to-make hearts frieze. Papercrafting doesn’t get much easier than…
Home decor Home decorations How to Papercraft Papercrafter Techniques Projects

1. Using a 3.5cm circle die, cut eight discs from chipboard and sixteen circles from patterned paper. Glue the patterned circles to either side of the discs and punch a…

Craft essentials
1. Cut a 5cm x 15cm strip of double-sided patterned paper and fold in half lengthways. Draw parallel pencil lines at 1.5cm and 2cm from the…


