


Use our free downloads and colouring pens to brighten up greetings
Craft Essentials, FREE colour therapy download from papercraftermagazine.co.uk, Faber-Castell Indian Ink PITT Artist Pens, ZIG Wink of Stella Sparkle Marker: Clear, Sentiment dies, Glossy Accents
Art therapy has taken the creative world by storm. There are many books dedicated to this craft on the market that offer an easy and accessible way to relax and release stress caused by everyday life, by inviting people to grab some pens and get colouring. All you need is a mixture of pretty shades and a design that you’d love to make your own. It will take you on a trip down memory lane, and once you start, you won’t be able to stop!
When you have coloured in your design, don’t just keep it shut in a book, use it to decorate your next creation. Here, I’ve taken a single image and decorated it with bright and bold hues to use as a card topper. It’s a great alternative to patterned papers, as the design is detailed enough to stand out on a white background. Using your art as embellishments also means you’ve customised your project completely.
You don’t have to stop at greeting cards. There’s endless ways to turn your art pieces into embellishments. Frame a design and give it to a loved one as a gift, decorate smaller images and transform them into earrings, or personalise a scrapbook with motifs you’ve customised yourself. It’s the perfect excuse to purchase the alcohol markers and colouring pencils you’ve always wanted!
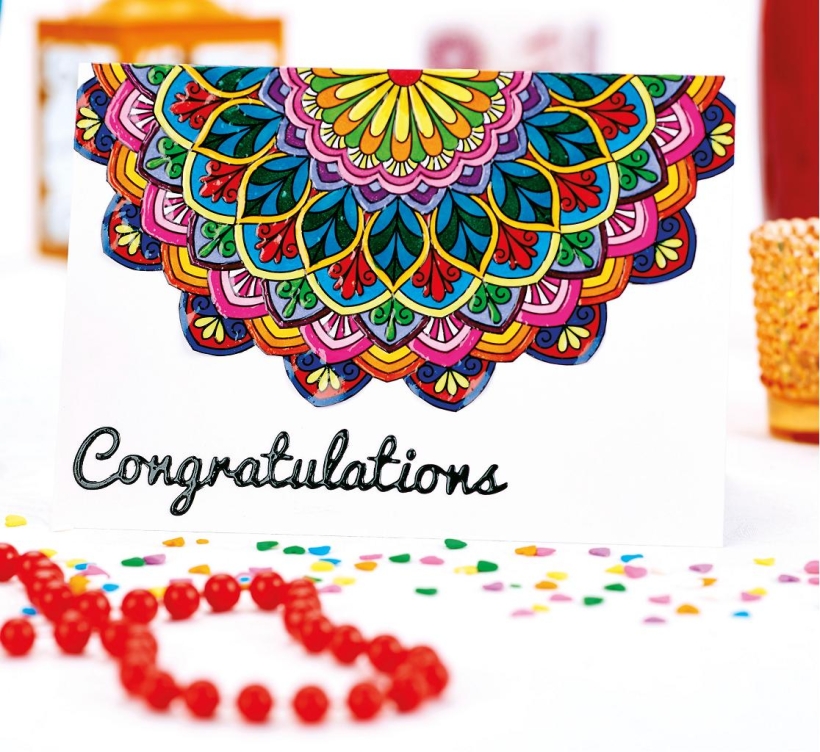
• Colour in a large mandala shape using a variety of different shades, adding sparkle to each area with a shimmer brush pen as you go along.
• Once all the sections are coloured in, cut out the design and cover the mandala with a layer of Glossy Accents. Once dry, score across the middle and adhere it to the centre of a glossy 12cm x 17.5cm top-fold blank.
• Die cut a ‘Congratulations’ sentiment and stick this to the bottom left of the greeting front. Cover it with Glossy Accents medium.
• Using alcohol markers, colour in a flower design that has three layers varying in size. Blend pink shades as you go along and add sparkle over the top of the blooms with a shimmer brush pen. Colour in the stems and leaves with green pen.

• Cut out your design, and add Glossy Accents on all the pieces. Stick two glittery silver strips across the bottom of a glossy 12cm x 17.5cm blank and adhere the stems and leaves to the centre.
• When the flower heads have dried, layer the pieces together using 3D foam pads and glue this next to the stems. Die cut a ‘Hi’ sentiment, stick it next to your design and coat with the varnish.

Busy lives often involve a lot of memos and reminders, and it can sometimes be hard to keep track. Luckily, we’ve got a sophisticated solution to keep your desk tidy and…

If you’re having a quiet Valentine’s with your beloved at home this year, make the place look a little more special with a speedy-to-make hearts frieze. Papercrafting doesn’t get much easier than…
Home decor Home decorations How to Papercraft Papercrafter Techniques Projects

1. Using a 3.5cm circle die, cut eight discs from chipboard and sixteen circles from patterned paper. Glue the patterned circles to either side of the discs and punch a…

Craft essentials
1. Cut a 5cm x 15cm strip of double-sided patterned paper and fold in half lengthways. Draw parallel pencil lines at 1.5cm and 2cm from the…


