

_820_1027_s_c1.jpg)


Card making Die cutting How to Papercraft Papercrafter Stamping Techniques Card Making
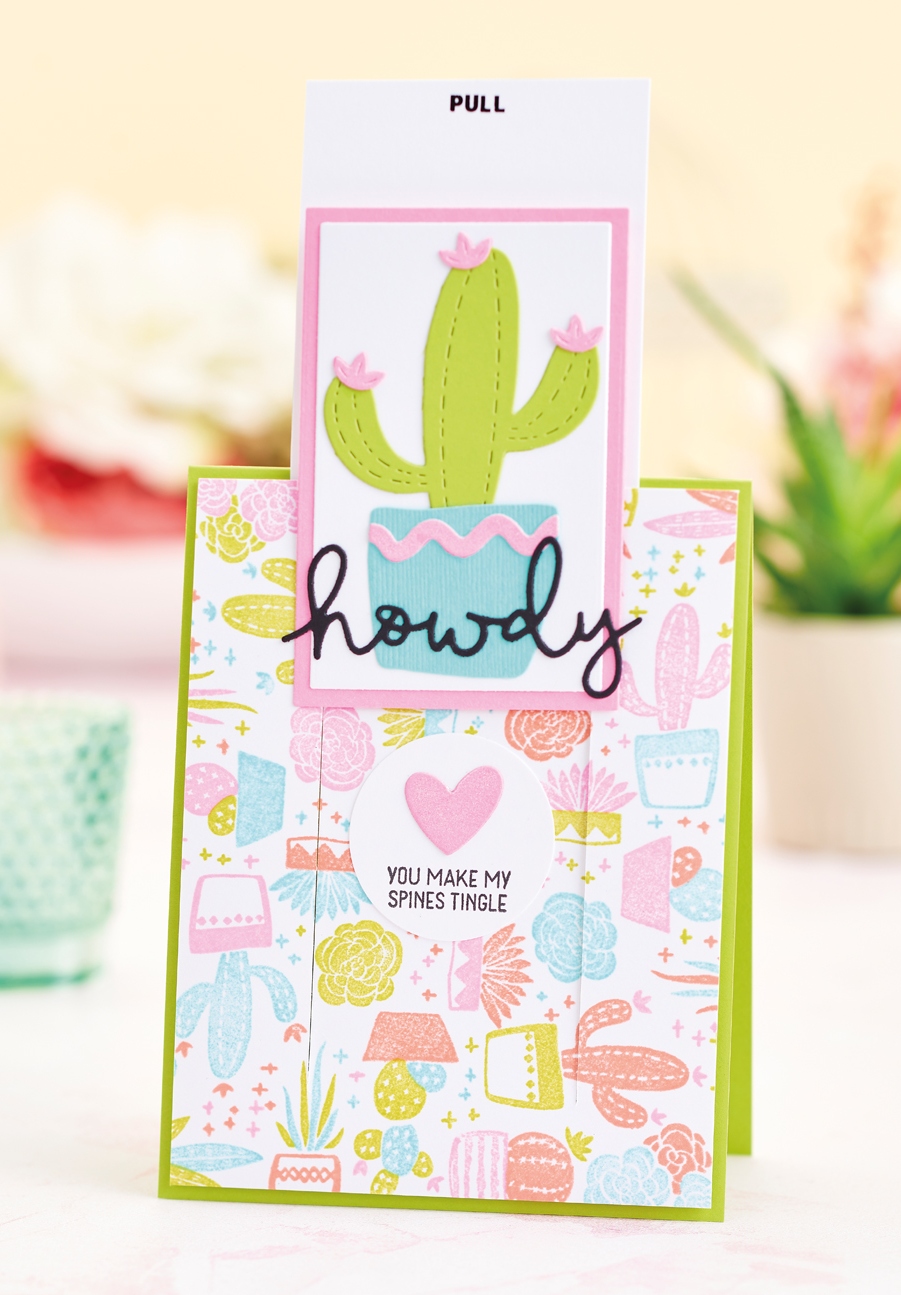
Add energy to your crafts with Colette Smith’s interactive succulent card
For all our fancy florals, luxurious card fronts and sumptuous embellishments, it helps to remember that it’s not all about how it looks – quite often it’s about what a greeting does. You’ll be hard pressed to find a recipient that doesn’t instinctively enjoy cards that require a little bit of input to fully appreciate it. Putting together this cactus-centric, kinetic creation from Colette is a joy in itself; an even greater joy is watching that excitement unfold on your recipient’s face.
YOU WILL NEED:
Stamps, Concord & 9th To The Point Turnabout
Dies, Concord & 9th To The Point
Cardstock: white, lime, pink, black
Ink pads: lime, pink, peach, blue, black
Punch, 1.5” circle
Spectrum Noir Sparkle Crystal Clear Shimmer Pen
Acetate
Adhesives: glue, double-sided tape, foam tape
Die-cutting machine
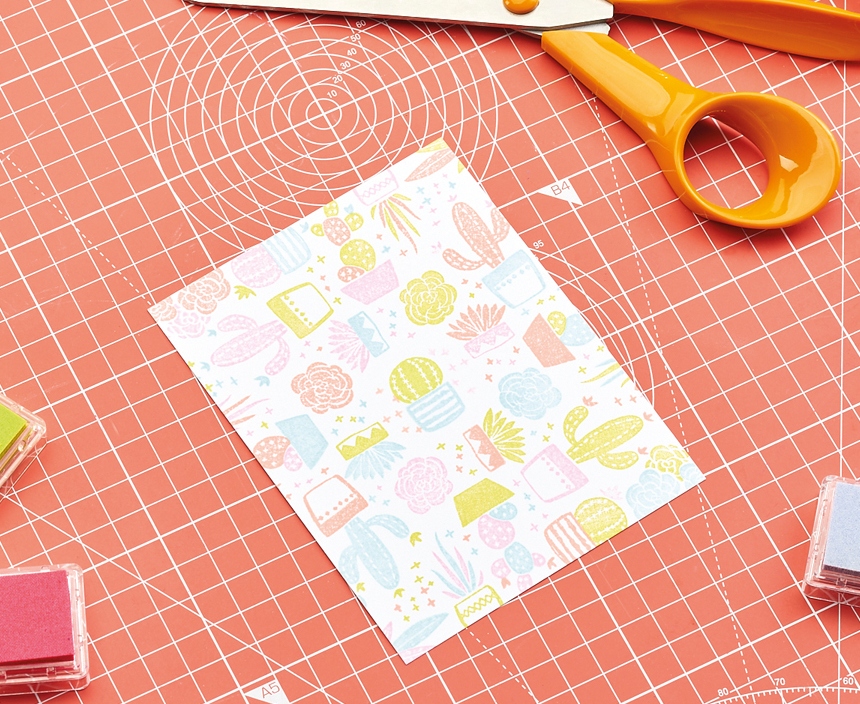
1. Stamp succulent motifs onto white card, 10cm x 13cm, using pink, peach, lime and blue ink pads
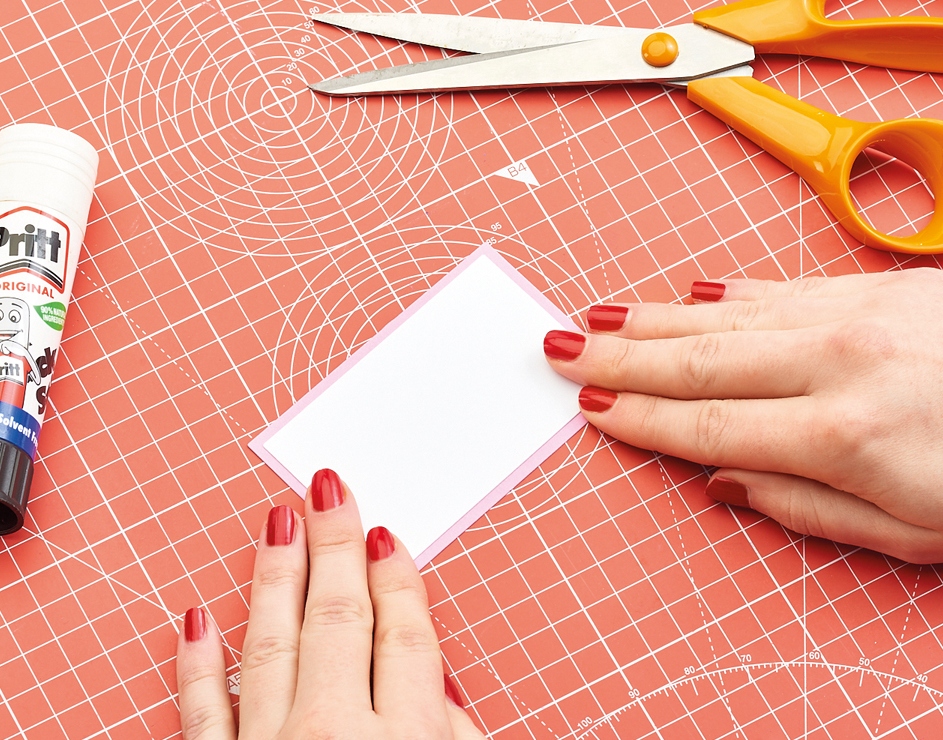
2. Layer white card onto a 6cm x 9cm panel of pink. Place centrally onto the reverse of the stamped panel
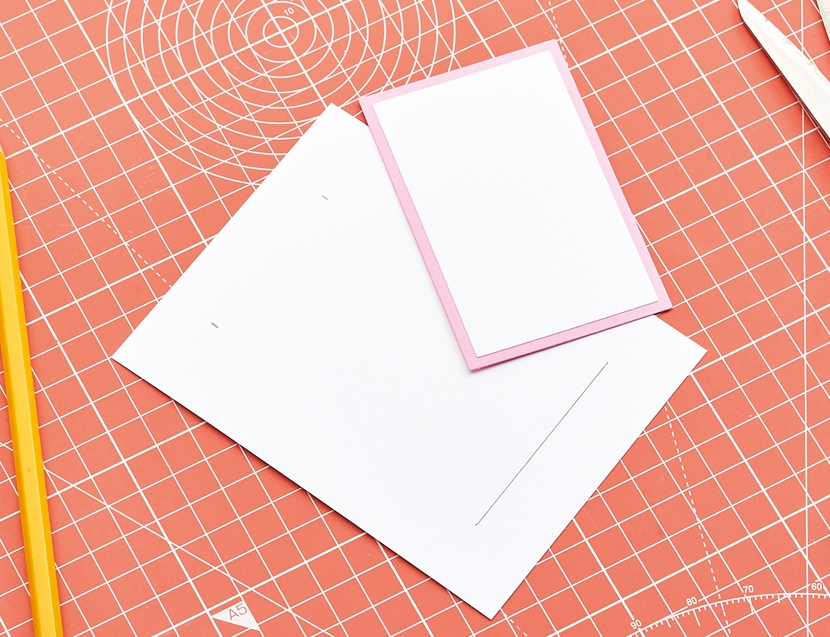
3. Draw a line along the bottom edge of the small panel in pencil, then mark 5mm in from the sides towards the top
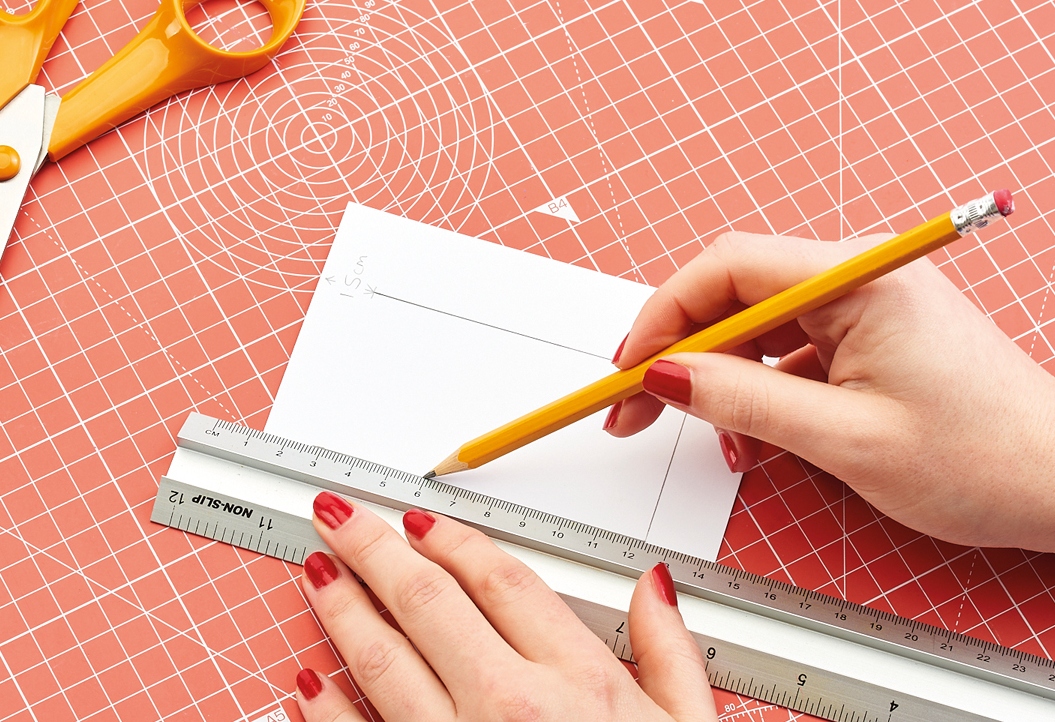
4. Connect the top marks to the bottom line. Starting 1.5cm in from the top, cut down the vertical lines with a craft knife
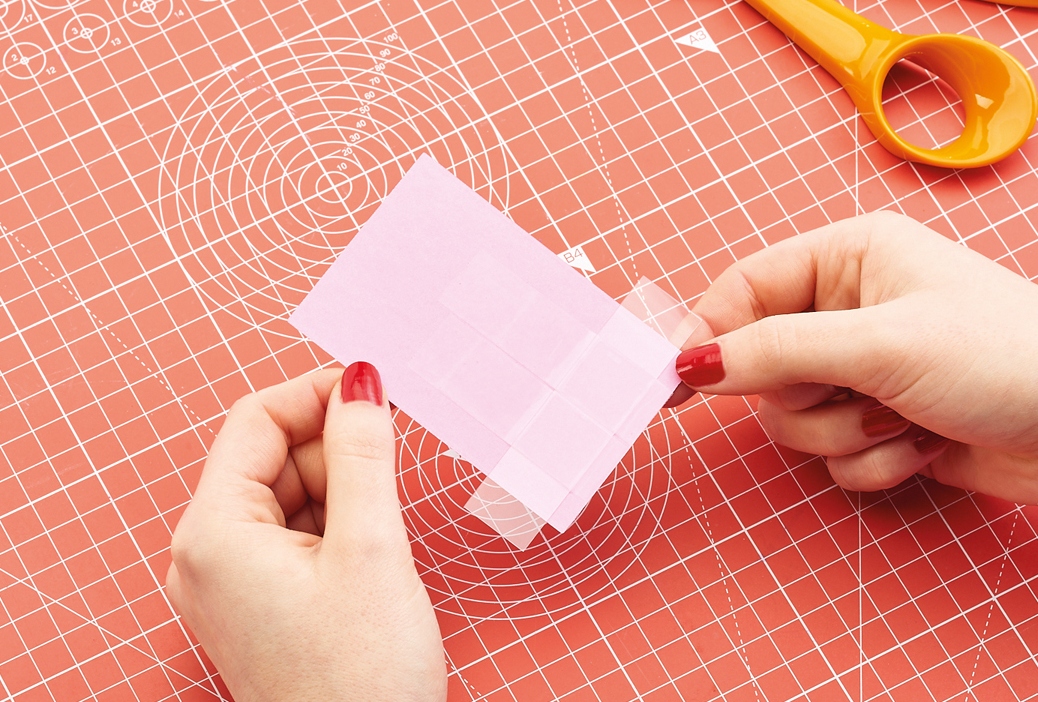
5. Trim acetate to 2cm x 8cm. Place 5mm above the bottom edge of the pink panel, then secure with tape, 1cm in from each side
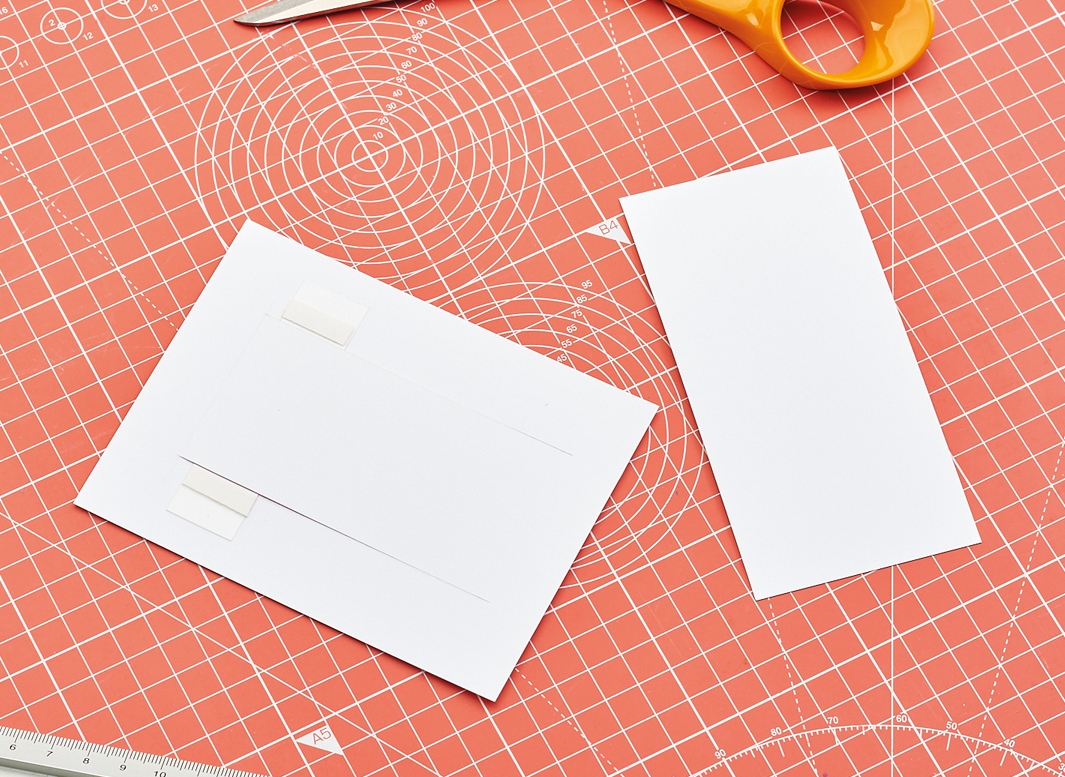
6. Pop the panel into the slits and let the acetate poke through. Add double-sided tape to each side. Fix white card, 6.5cm x 13cm, on top to make a slider tab
7. Snip the acetate until it aligns with the sides of the slider tab. Apply foam tape to either side; close but not touching. Add another piece below the tab
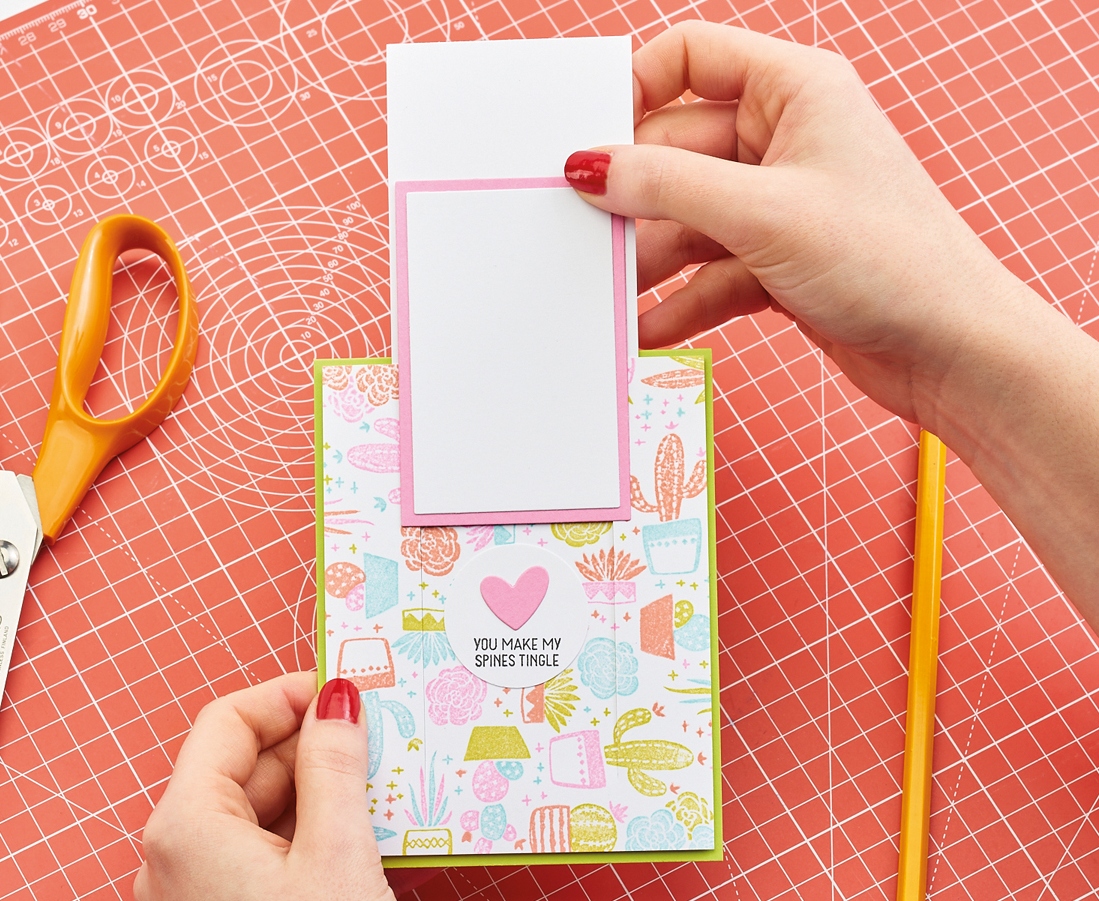
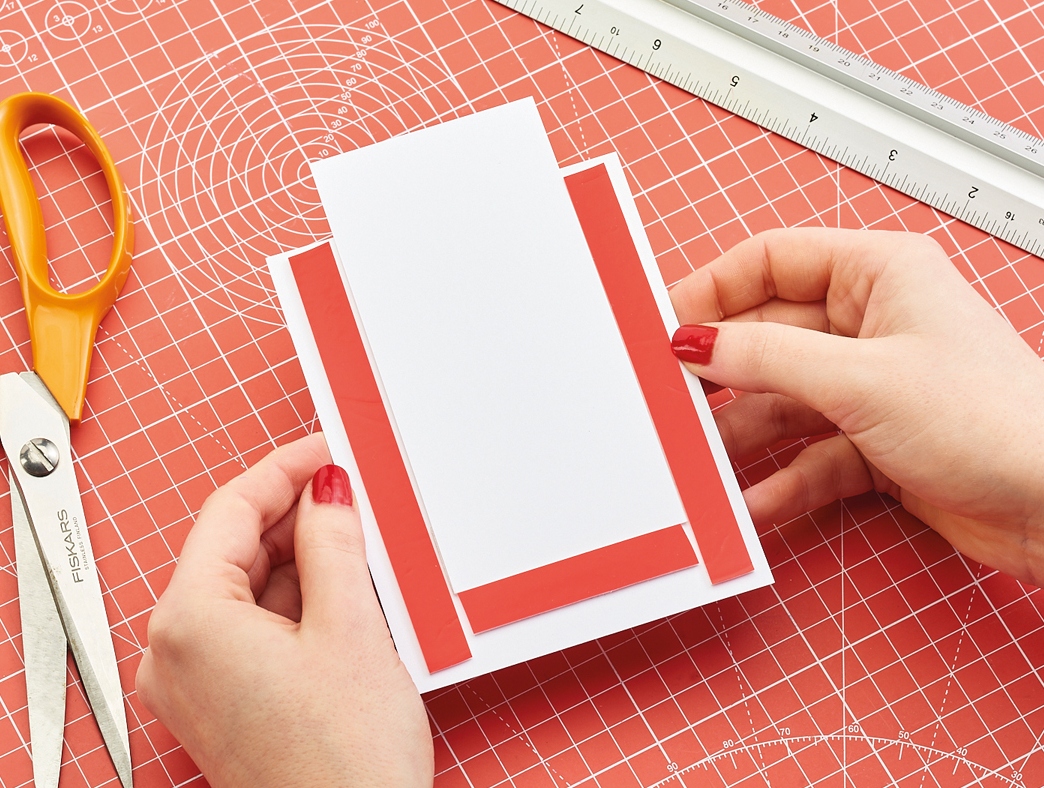
8. Attach the stamped panel onto a lime blank, 10.5cm x 13.5cm. Adhere a sentiment and heart, ensuring they are hidden when the slider tab is down
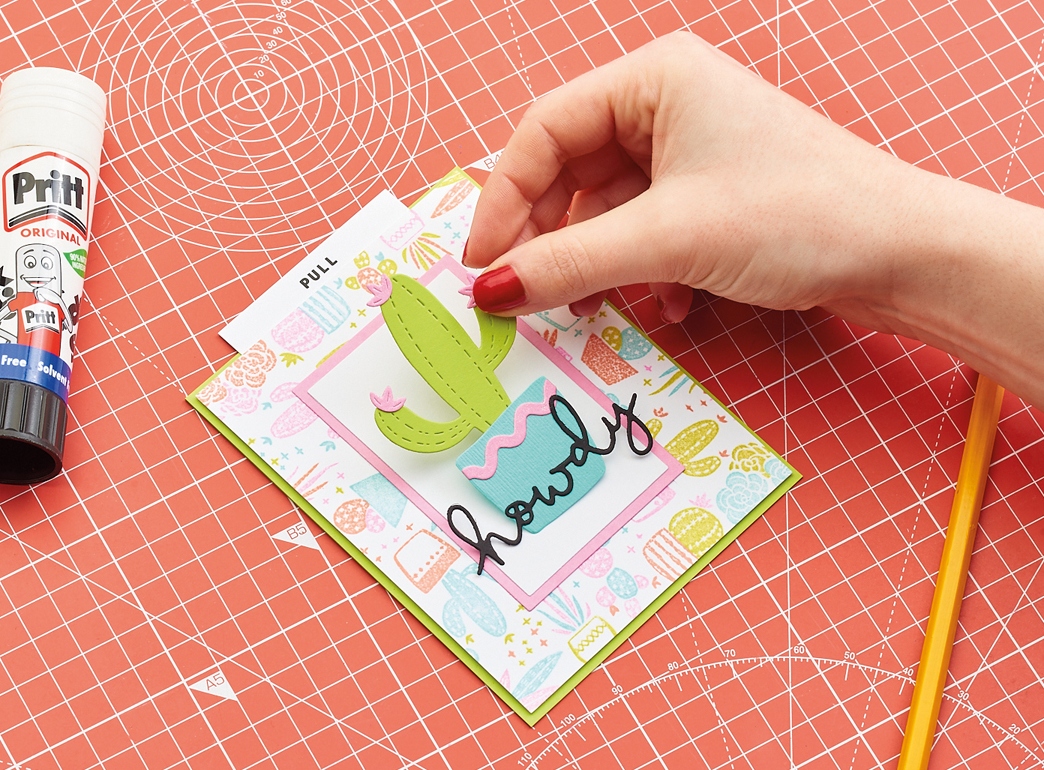
9. Add a sentiment to the top of the tab. Die cut a cactus from green, pink and blue, along with ‘Howdy’ from black. Assemble and glue to the slider panel

Busy lives often involve a lot of memos and reminders, and it can sometimes be hard to keep track. Luckily, we’ve got a sophisticated solution to keep your desk tidy and…

If you’re having a quiet Valentine’s with your beloved at home this year, make the place look a little more special with a speedy-to-make hearts frieze. Papercrafting doesn’t get much easier than…
Home decor Home decorations How to Papercraft Papercrafter Techniques Projects

1. Using a 3.5cm circle die, cut eight discs from chipboard and sixteen circles from patterned paper. Glue the patterned circles to either side of the discs and punch a…

Craft essentials
1. Cut a 5cm x 15cm strip of double-sided patterned paper and fold in half lengthways. Draw parallel pencil lines at 1.5cm and 2cm from the…


