


Christmas crafts Die cutting Home decor Papercraft Techniques
* ADVERTORIAL *
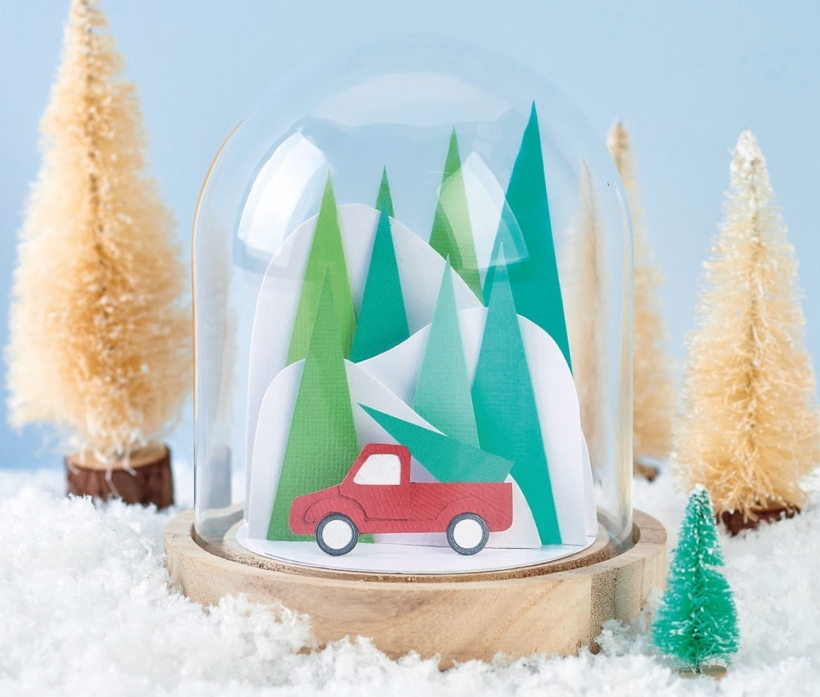
Capture the most magical Christmas scene of all with Corinne Bradd’s quick and easy die-cut display using the Brother ScanNCut
You Will Need:
Templates or SVG files
Brother ScanNCut SDX2200D
Cardstock, various colours
Glass dome with wooden base (ours is from Hobbycraft)
Marker pen, black
Glue
3D Snow Dome
1. Measure the width of your dome base and cut a circle from white card to the same size using the preloaded library on the ScanNCut. Download the templates from our website. Scan them into your machine and save, attaching the cut-out pieces to the main truck door shape.
2. Group the shapes together and enlarge or reduce so the base of the largest hill is the same width as the base circle. Ungroup the shapes so they can be cut from different coloured cardstock. Cut the hills from white, the truck from red, and its wheels and window from white.
3. Make copies of the tree shape. Enlarge and reduce to create different sizes and cut from various shades of green. Fix the white circle disc to the base of the dome. Score along the bottom edge of each hill and fold the tabs in opposite directions so they can be glued to the base and stand upright. Place the largest hill in the centre and two small ones either side.
4. Apply tacky glue along the bottom edge of each tree and slip the shapes between the hills. Secure a tree to the front of the smallest hill. Assemble the truck pieces and add tyres around the wheels with a black marker pen. Secure a small tree into the back of the truck. Apply glue to the bottom of each wheel and fix the truck in the foreground.
“Ensure your trees are not too tall for the dome. Leave at least 1cm clearance and place the dome over the arrangement before glueing to check”
Corinne Bradd, designer

Busy lives often involve a lot of memos and reminders, and it can sometimes be hard to keep track. Luckily, we’ve got a sophisticated solution to keep your desk tidy and…

If you’re having a quiet Valentine’s with your beloved at home this year, make the place look a little more special with a speedy-to-make hearts frieze. Papercrafting doesn’t get much easier than…
Home decor Home decorations How to Papercraft Papercrafter Techniques Projects

1. Using a 3.5cm circle die, cut eight discs from chipboard and sixteen circles from patterned paper. Glue the patterned circles to either side of the discs and punch a…

Craft essentials
1. Cut a 5cm x 15cm strip of double-sided patterned paper and fold in half lengthways. Draw parallel pencil lines at 1.5cm and 2cm from the…


