


Birthday crafting Card making Papercraft Papers
Start blaring Stevie Wonder… it’s time to wish someone a happy birthday!
Please login to download. Sign in here
These lively and oh-so-lovely prints by Millicent Venton have us frantically checking the calendar to see whose birthday is next, because we can’t wait to craft with them. A true highlight is the print featuring gal pals having a right ol’ shindig (hello bar cart!) and we adore the flower bouquet paper too. Background designs offer confetti, bunting and balloons, so you’re guaranteed to get the party started with this 31-piece collection.
Here’s some project inspiration…
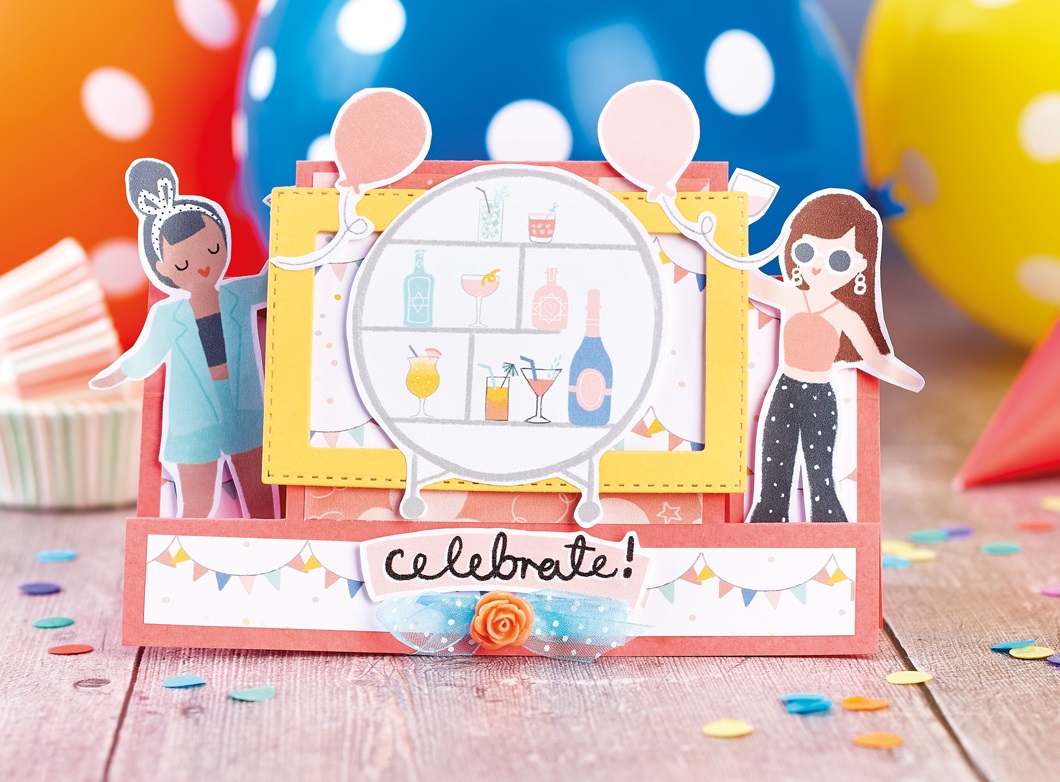
Stepper Card
1. Use our template to draw, cut out, score and fold a stepper blank from pink card. Adhere balloon paper, 8cm x 9cm, to the central panel. Trim two pieces of bunting paper, 2.5cm x 7.5cm, and another piece to 2cm x 16cm, then fix to the sides and across the bottom.
2. Trim two ladies and secure to the side panels with 3D foam pads. Die cut a 7cm x 11cm stitched rectangle from yellow card, then cut a smaller rectangle through it to create a frame. Attach paper behind with 3D foam pads and fix to the central panel.
3. Cut out a bar cart and adhere onto the frame with 3D foam pads. Snip two balloons and stick in the top corners of the frame. Attach our ‘Celebrate!’ sentiment below with 3D foam pads, then add an organza bow and resin flower underneath.
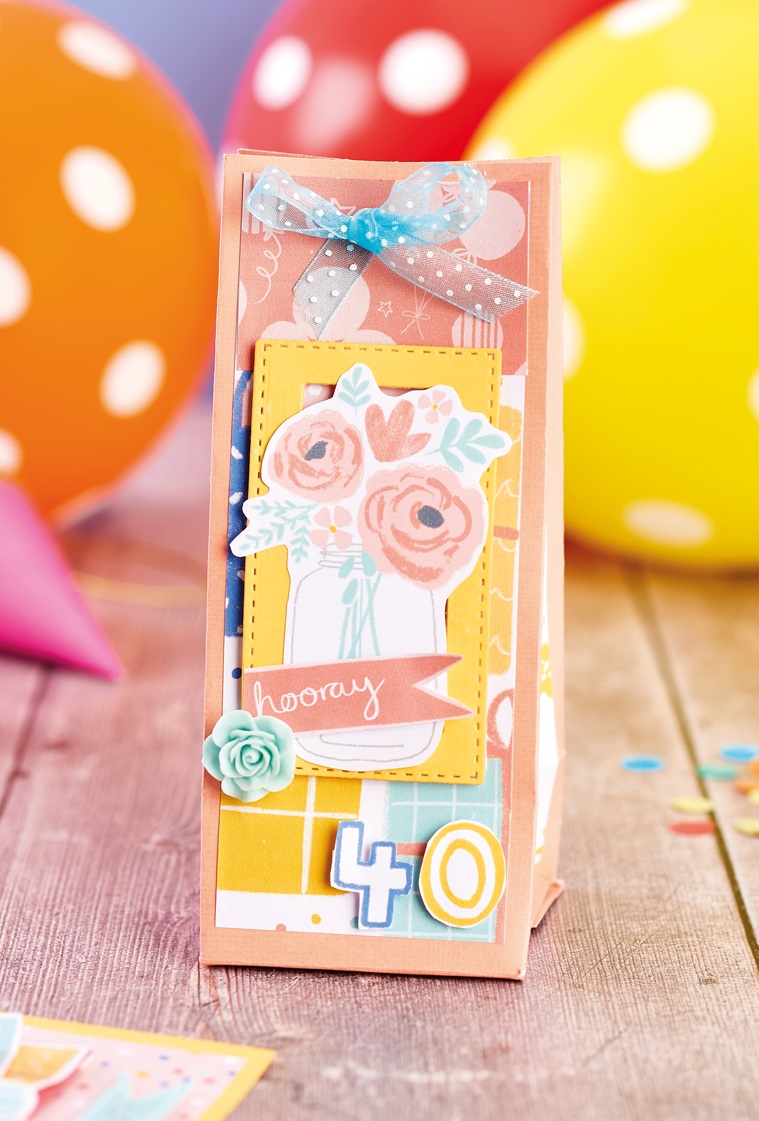
Birthday Gift Bag
1. Use our template to draw, cut out, score and fold a gift bag from peach card. Trim present paper to 6cm x 11.5cm and balloon paper to 4cm x 6cm, then stick to the front.
2. Fix two pieces of contrasting paper, 2.5cm x 15.5cm, to the sides. Fold the base flat and adhere together. Punch holes through the top, thread with organza ribbon, then tie in a bow.
3. Die cut a 5cm x 9cm stitched rectangle from yellow card, then die cut a smaller rectangle through it to create a frame. Attach paper behind with 3D foam pads and adhere to the front.
4. Cut out a vase of flowers and a small sentiment, then stick to the frame. Add a resin flower in the bottom-left corner. Trim numbers for the recipient’s age and secure in the bottom-right corner with 3D foam pads.
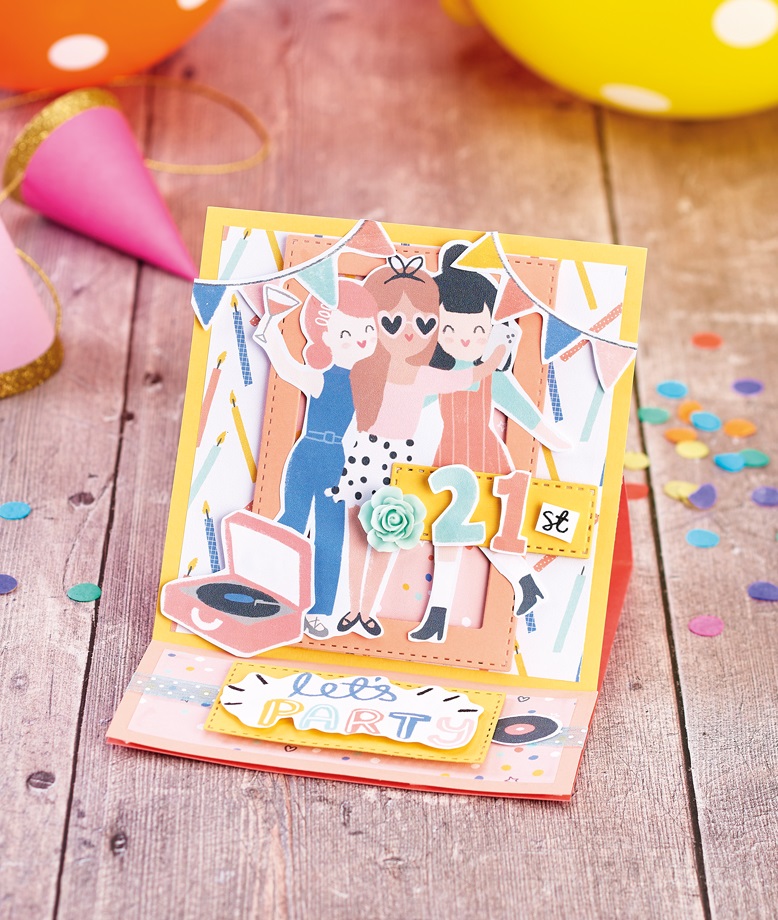
Scene-setting Easel Card
1. Create a 13cm square top-folding pink blank. Score and fold the front in half to create an easel card. Trim peach card to 5.5cm x 13cm and confetti paper to 4.5cm x 12cm. Layer up, wrap organza ribbon around the centre, then adhere to the base panel.
2. Die cut a 4cm x 8cm stitched rectangle from yellow card and attach a sentiment on top with 3D foam pads. Stick to the base with 3D foam pads to act as a stopper for the front panel. Add a record on the right-hand side.
3. Trim yellow card, 13cm square, and candle paper, 12cm square. Layer together. Die cut an 8cm x 12cm stitched rectangle from peach, then cut a smaller rectangle through it to create a frame. Attach confetti paper behind with 3D foam pads and fix on top of the candle panel.
4. Snip a trio of ladies, two lots of bunting and a record player, then attach in and around the frame. Adhere this whole section to the front panel under the central fold, then tuck behind the stopper.
5. Die cut a 2cm x 6cm stitched rectangle from yellow, then secure numbers on top. Attach on the right-hand side with 3D foam pads. Finish with a resin flower in the corner.
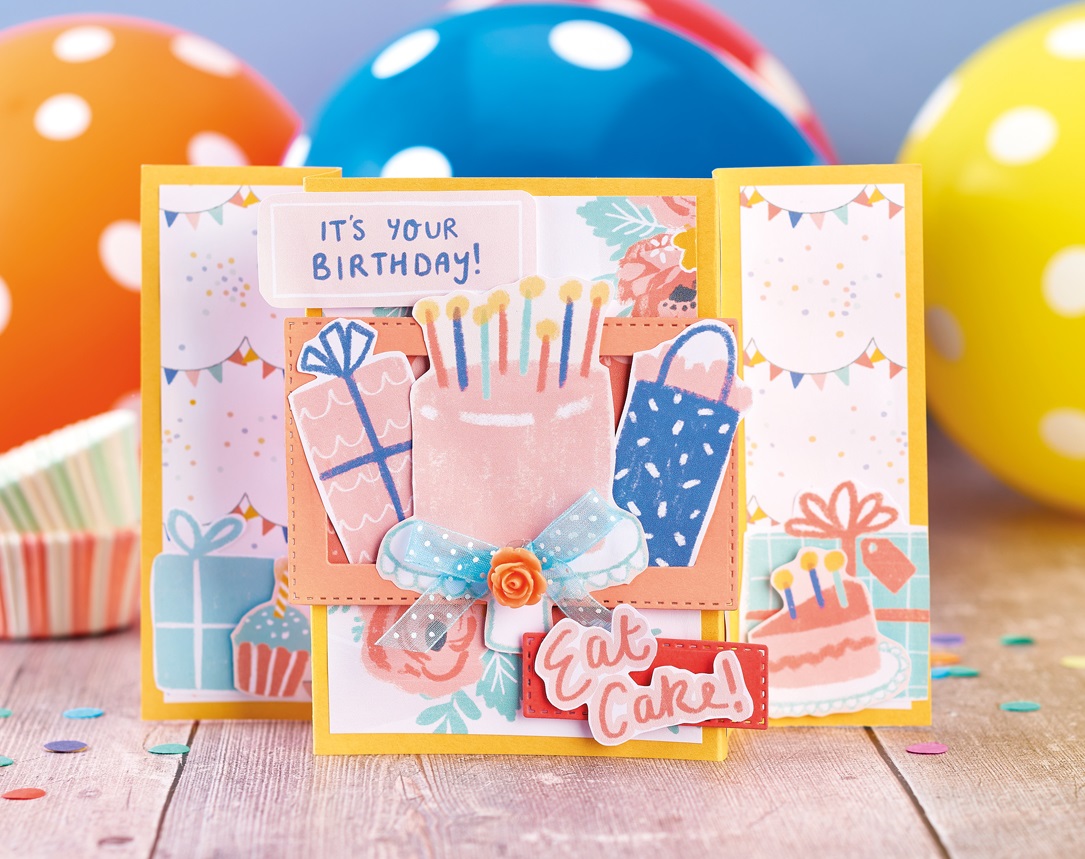
Fancy Fold Birthday Card
1. Trim yellow card to 14cm x 28cm. Score down from the long side at 5cm, 9cm, 19cm and 23cm. Valley fold the outside score lines and mountain fold the others. Matt the central panel with floral paper, then the outside panels with bunting print. Trim two pieces of heart paper, 3cm x 13cm, then adhere to the other panels.
2. Die cut a 7cm x 11cm stitched rectangle from peach and cut a smaller rectangle through it to create a frame. Secure paper behind with 3D foam pads, then adhere to the central panel. Trim a cake and two presents. Fix in the frame with 3D foam pads.
3. Attach a sentiment above the frame on the left-hand side with 3D foam pads. Die cut a 2cm x 6cm stitched rectangle from dark pink and fix in the bottom-right corner with 3D foam pads. Add a sentiment on top. Apply present and cake motifs to the outside panels. Adhere an organza bow and resin flower to the cake in the central panel.
Loving our free papers? We’ve got lots more for you to enjoy.

To download our templates, simply click ‘Download Now!’ and it will open in your browser. Why not send us a picture of your project once you’re done? For your chance to be…
Home decor Home decorations Papercraft Papercrafter Party makes Templates

There’s nothing quite so relaxing, or quite so fun, as settling down with a good colouring page. It’s even better if that colouring page happens to include Wallace & Gromit. This duo…
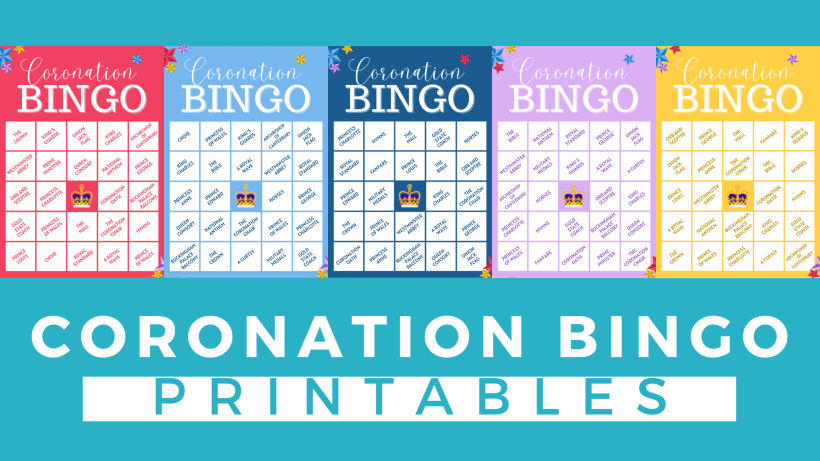
Gather your friends, get the TV on, bring a pen, and play Coronation Bingo! Extra points for prizes.
HOW TO PLAY
1. Each player will need one scorecard and a pile of…
.png)
Featuring motifs full of whimsy and joy, this Clearly Besotted digi stamp set is perfectly suited to wish someone a happy day. Use your nine-piece printable pack as many…


