


A 38-piece pack full of summer fun? Oh go on then!
You can practically feel the sun on your skin and the sand between your toes with these glorious illustrations by Jane Farnham. They feature people taking to the waters and soaking up the rays (check out their cute cossies!) to seaside necessities like sunglasses, flip flops and parasols. Your papers also include vibrant borders, cut-out-and-place sentiments and background prints. Sunshine is guaranteed for this crafting session…
Get ready to try out some new techniques. With Sarah Jackman Read by your side, you’ll learn how to let your toppers sing with clever frame die-cuts and dimension-boosting 3D foam pads. Discover the perfect measurements for a z-fold card, make the most of layering methods, choose contrasting prints for impact. It’s going to be a lot of fun!
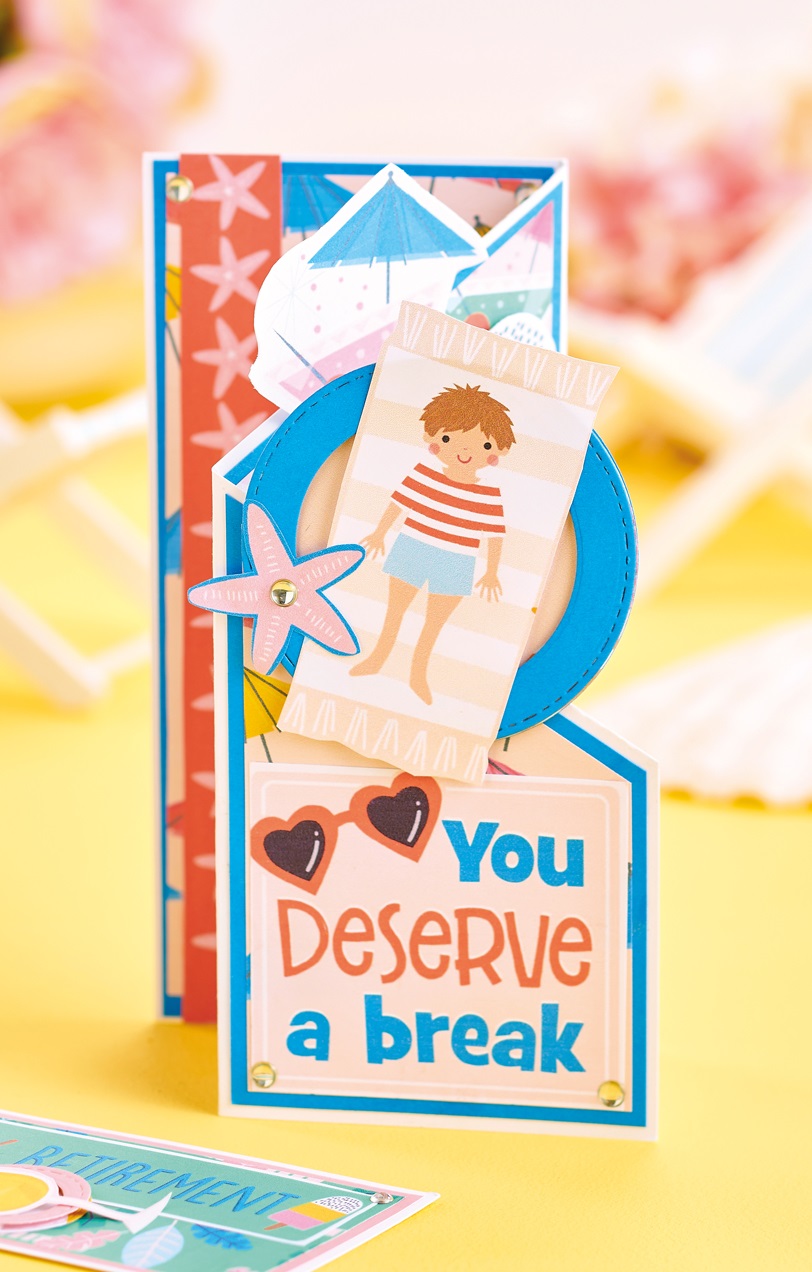
Z-Fold Card
1. Snip white card to 17cm x 24cm. Score down from the longest edge at 8cm and 16cm. Mark 7cm up from the bottom-right corner. Draw a line from the mark to the top of the first score line, then trim away the excess card above the line.
2. Valley fold the first score line and mountain fold the second. Matt all panels with blue card, then layer patterned papers on top. Adhere a starfish border down the back panel on the left. Cut out a cocktail and ice lolly, then attach to the central panel with 3D foam pads.
3. Trim our ‘You deserve a break’ sentiment and fix to the card front. Die cut a 7cm stitched circle from blue card and patterned paper, then die cut a 5cm circle through the blue circle to create a frame. Add the patterned paper behind the frame with 3D foam pads.
4. Cut out a sunbather and attach to the frame with 3D foam pads. Adhere to the top of front panel with 3D foam pads. Add a starfish and finish with iridescent gems.
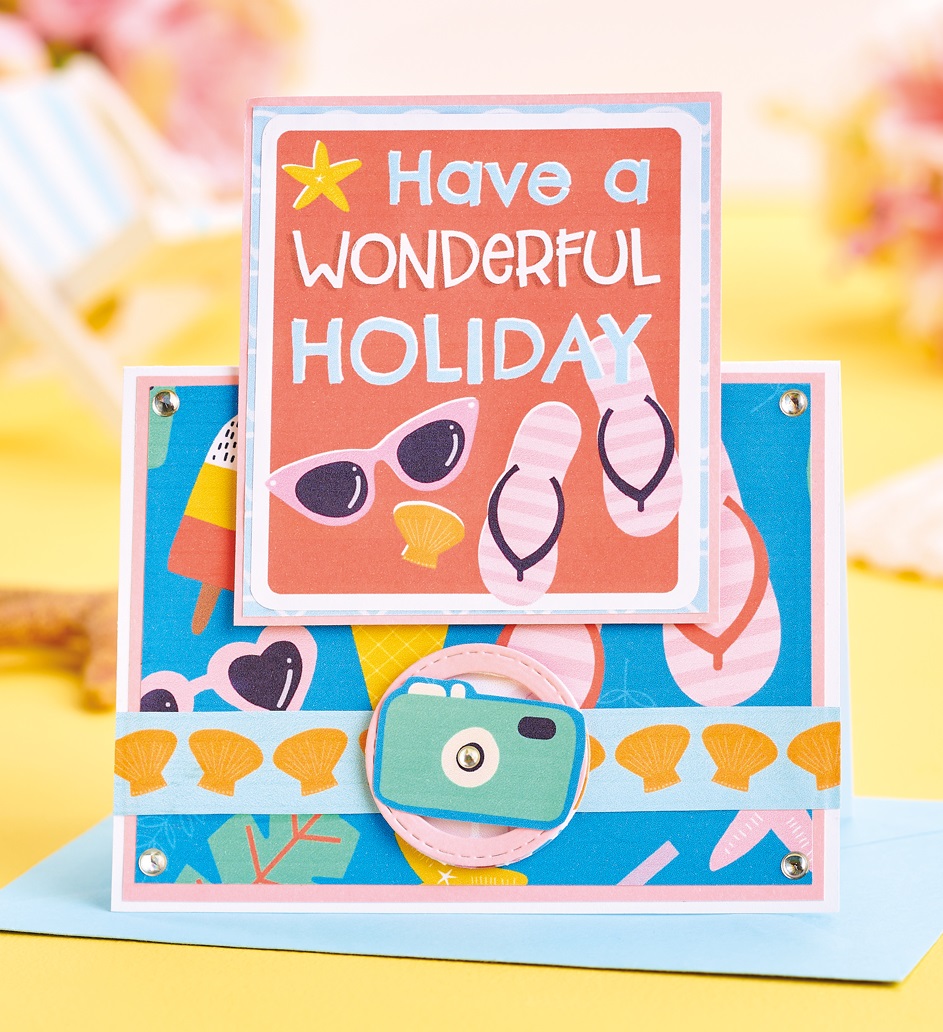
Have A Wonderful Holiday Card
1. Create a 10cm x 13cm top-folding white blank and matt with pink card. Layer flip flop paper on top. Matt ‘Have a wonderful holiday’ onto sea paper, then pink card. Attach to the top of the greeting with 3D foam pads so half of it extends above the fold. Adhere a shell border below.
2. Die cut a 4cm stitched circle from pink card and patterned paper, then die cut a 3cm circle through the pink circle to create a frame. Attach the patterned paper behind the frame with 3D foam pads. Secure a camera to the frame with 3D foam pads, then fix in the centre of the border. Finish with iridescent gems.
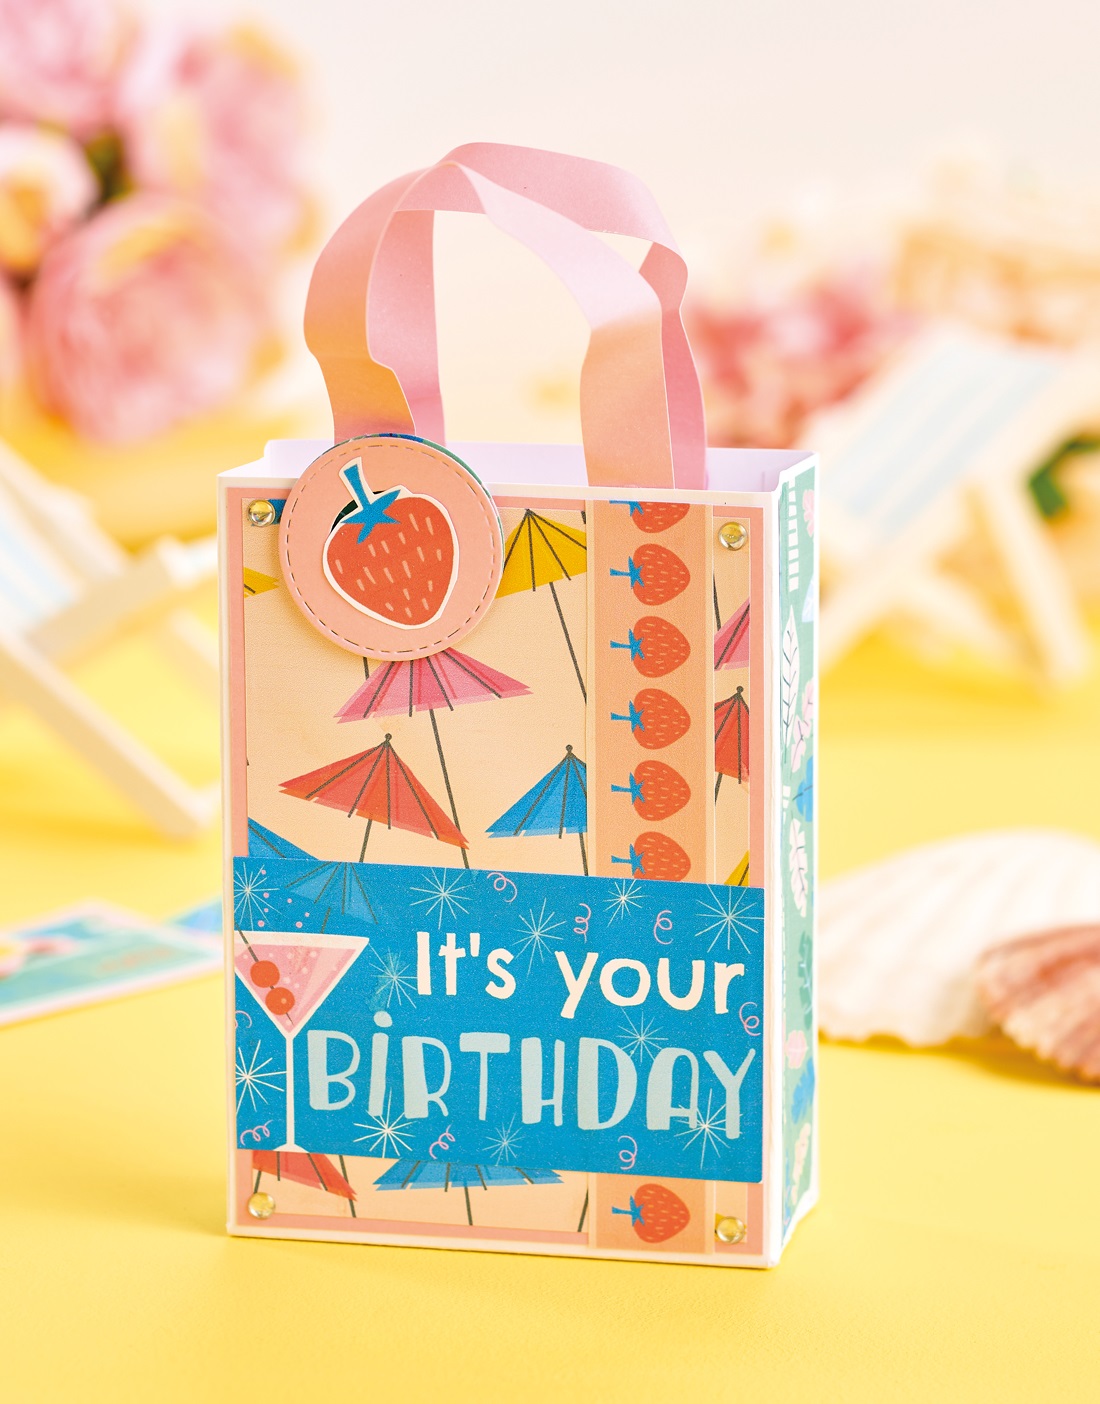
DIY Gift Bag
1. Using our template, draw, cut out and score a gift bag from white card. Layer parasol paper, 9cm x 13cm, onto pink card and adhere to the front. Trim two pieces of contrasting paper to 3cm x 13.5cm, then fix to the sides.
2. Adhere a strawberry border to the front, down the right-hand side. Cut our ‘It’s your birthday’ sentiment to fit the front, then stick in place. Run double-sided tape down the flap, fold the score lines and secure together. Fold the base, then fix in place.
3. To create handles, attach two pieces of pink card, 1.5cm x 18cm, to the top. Die cut a 4cm stitched circle from pink card and patterned paper, then die cut a 2cm circle through the pink circle to make a frame. Adhere the patterned paper behind the frame with 3D foam pads. Add a strawberry and fix at the base of the left handle. Finish with gems.
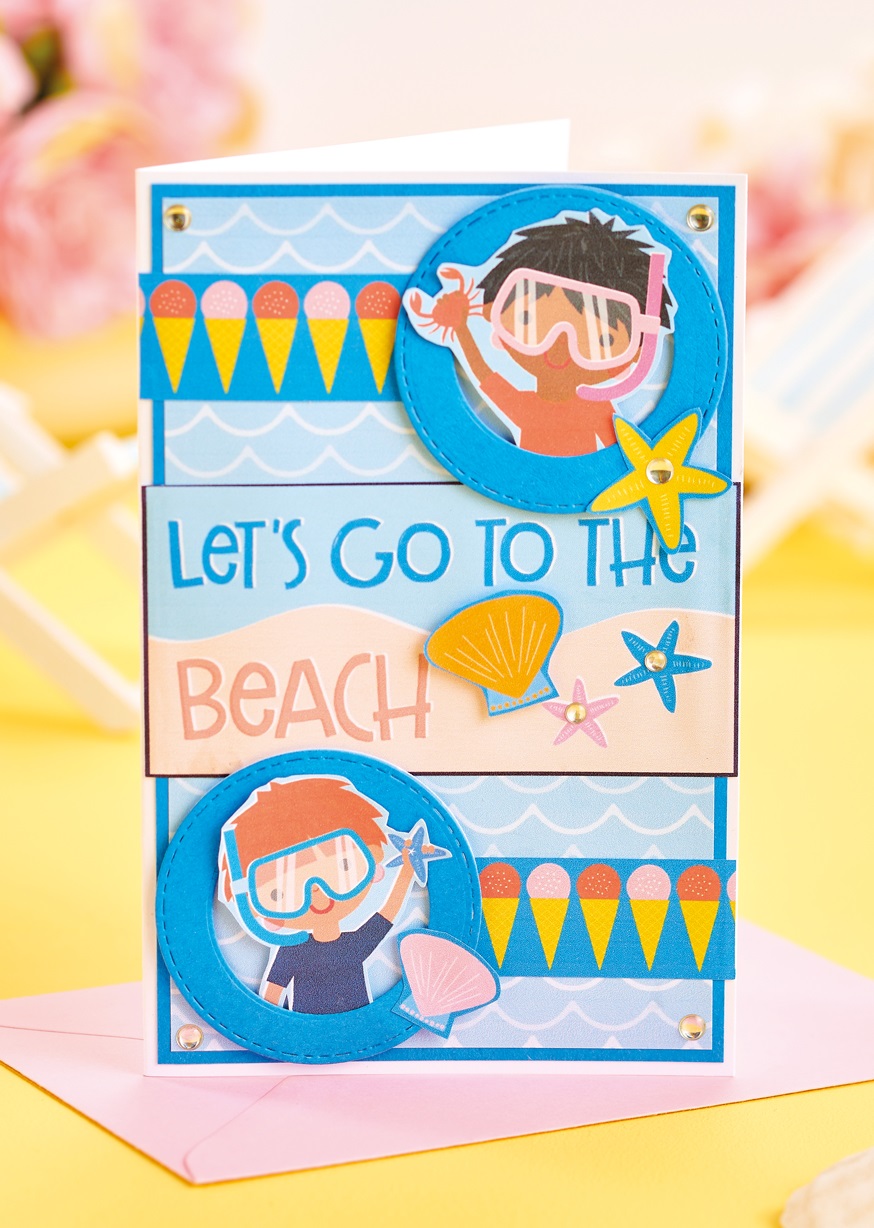
Let’s Go To The Beach Card
1. Matt the front of an 11cm x 17cm white blank with blue card. Add sea paper on top. Trim our ‘Let’s go to the beach’ sentiment to fit across the middle, then adhere in place.
2. Die cut two 6cm stitched circles from blue card and sea paper, then die cut 4cm circles through the blue circles to create frames. Attach the sea paper behind with 3D foam pads.
3. Cut out two characters and secure in the frames with 3D foam pads. Adhere one top-right and the other bottom-left. Fix an ice cream border next to both circles. Add two shells and a starfish, then finish with iridescent gems.
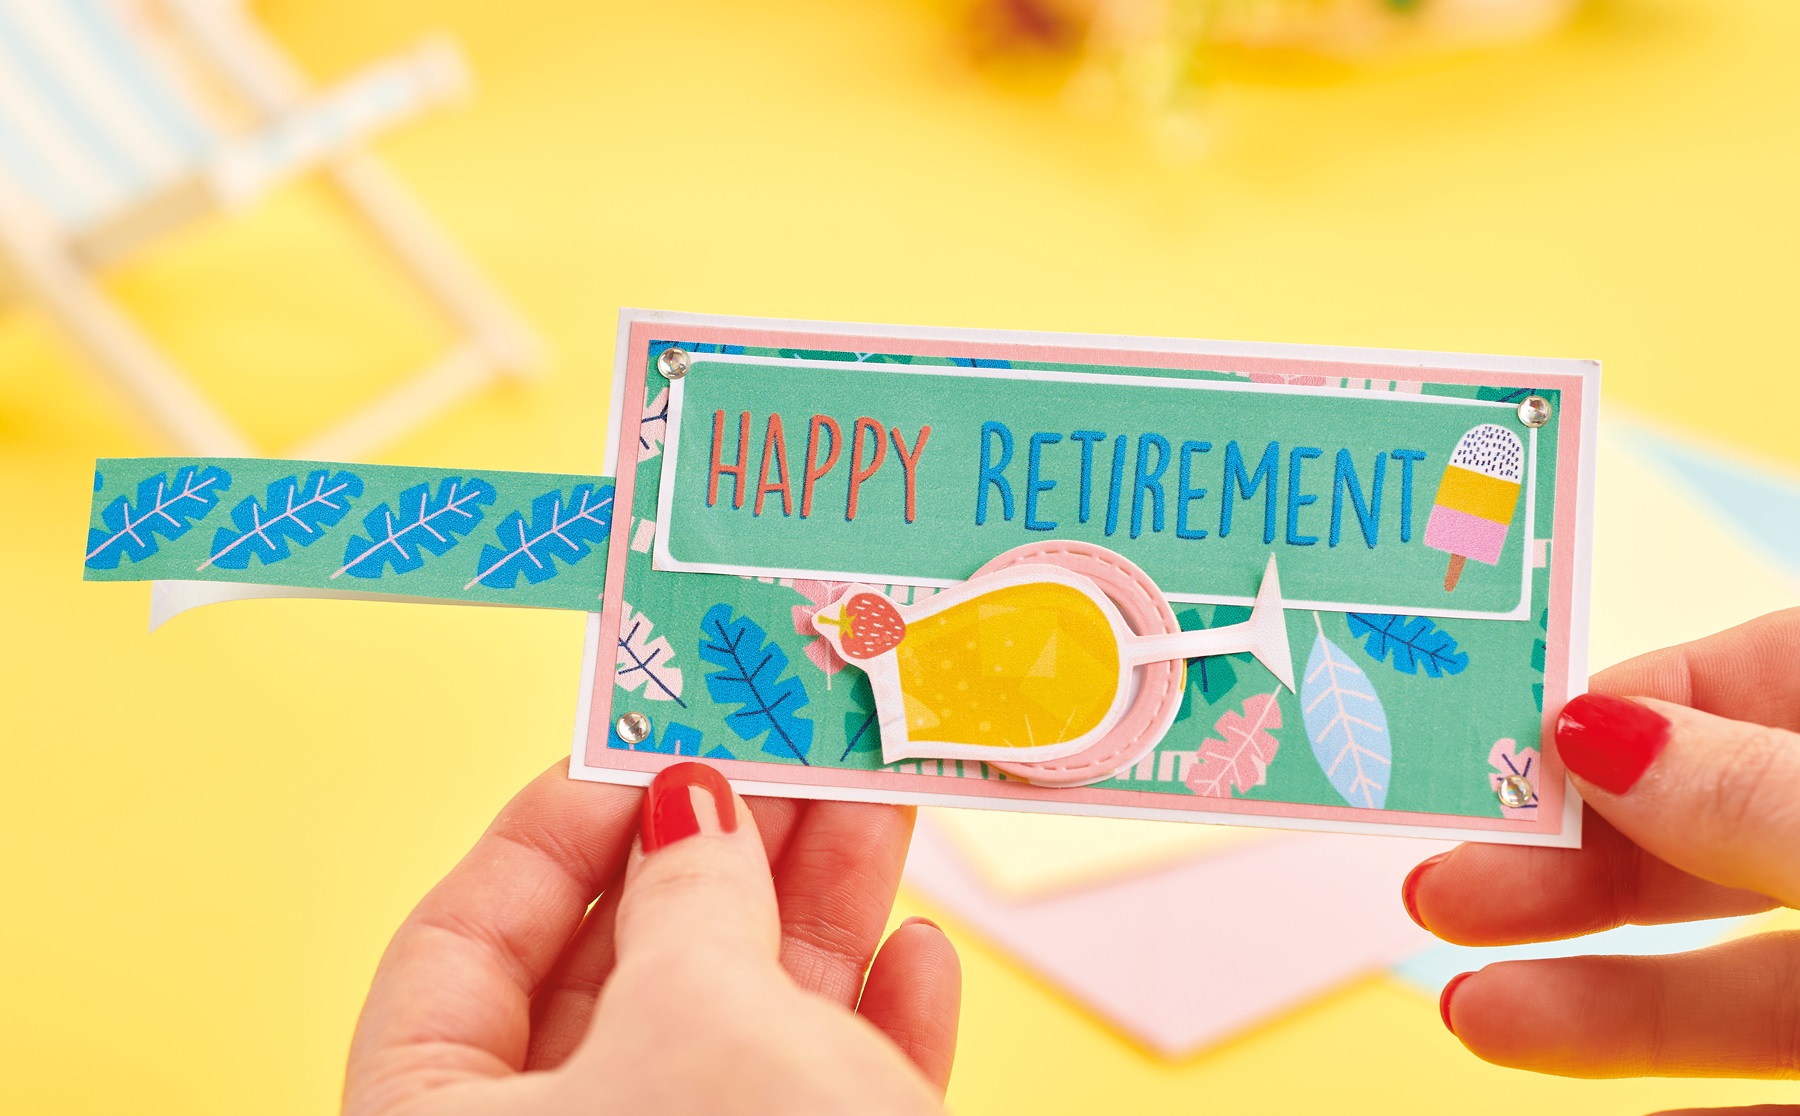
Happy Retirement Gift Tag
1. Trim white card to 6cm x 12cm. Fold a leaf border, 14cm long, in half and adhere to the top. Matt the white card with pink. Fix palm tree paper, 5cm x 12cm, on top and secure a sentiment down the right-hand side.
2. Die cut a 3cm stitched circle from pink card and patterned paper. Die cut a 2cm circle through the pink circle to create a frame, then attach the patterned paper behind the frame with 3D foam pads. Add a cocktail to the frame with 3D foam pads. Adhere on the left with 3D foam pads, before completing with gems.
Loving our paper collections? We’ve got lots more for you to enjoy.

To download our templates, simply click ‘Download Now!’ and it will open in your browser. Why not send us a picture of your project once you’re done? For your chance to be…
Home decor Home decorations Papercraft Papercrafter Party makes Templates

There’s nothing quite so relaxing, or quite so fun, as settling down with a good colouring page. It’s even better if that colouring page happens to include Wallace & Gromit. This duo…
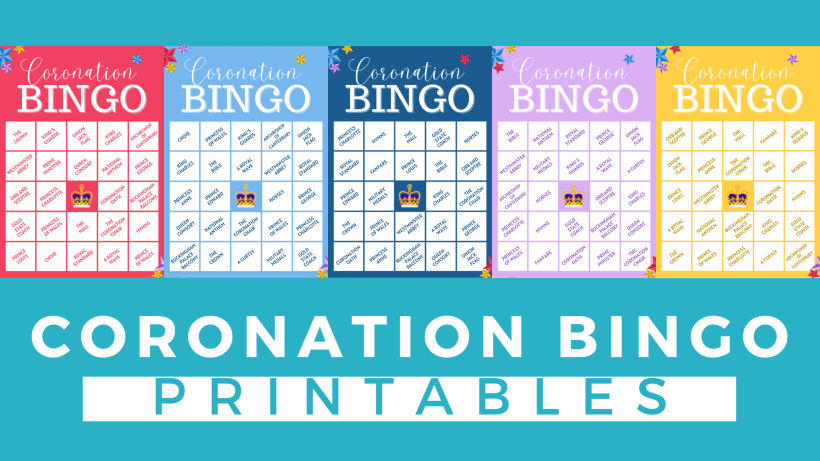
Gather your friends, get the TV on, bring a pen, and play Coronation Bingo! Extra points for prizes.
HOW TO PLAY
1. Each player will need one scorecard and a pile of…
.png)
Featuring motifs full of whimsy and joy, this Clearly Besotted digi stamp set is perfectly suited to wish someone a happy day. Use your nine-piece printable pack as many…


