We answer your questions about this time-honoured decoupage technique – it’s so much easier than it looks!
First things first… what is pyramage?
The pyramage technique is an alternative, more precise form of classic 3D decoupage that provides shape and structure. The main image is built up using graduating layers of the design, creating a pyramid shape – hence the name! Traditionally square or rectangular layers are used, but layers can also be round, oval or any shape you wish.
Do I need to go shopping?
As if you needed an excuse! Chances are, you’ll have lots of the necessary supplies in your stash already. Digital cardstock, colouring pens, foam tape and a trusty craft knife are the essentials, and of course you’ll need a printer for the templates. If tech isn’t your thing, why not try creating your own design? When creating your own artwork, twist the cuts clockwise or anti-clockwise to create another interesting effect.
What do I need to bear in mind?
We’re so glad you asked. Here are our designer-approved top tips:
- Before sticking down a layer, cover the foam tape with PVA glue. This will give you a bit more movement when lining up the images. When the glue has dried the layer will be held in place as normal.
- To save time, just colour the outside of each layer, making sure that no white parts are visible. The only one that needs to be coloured in fully is the final uppermost layer.
- Nesting dies are the ideal way to create your own pyramage designs. Just make sure that the same section of the main image is used and that each layer is lined up perfectly with the one below.
Is it high time I gave it a go?
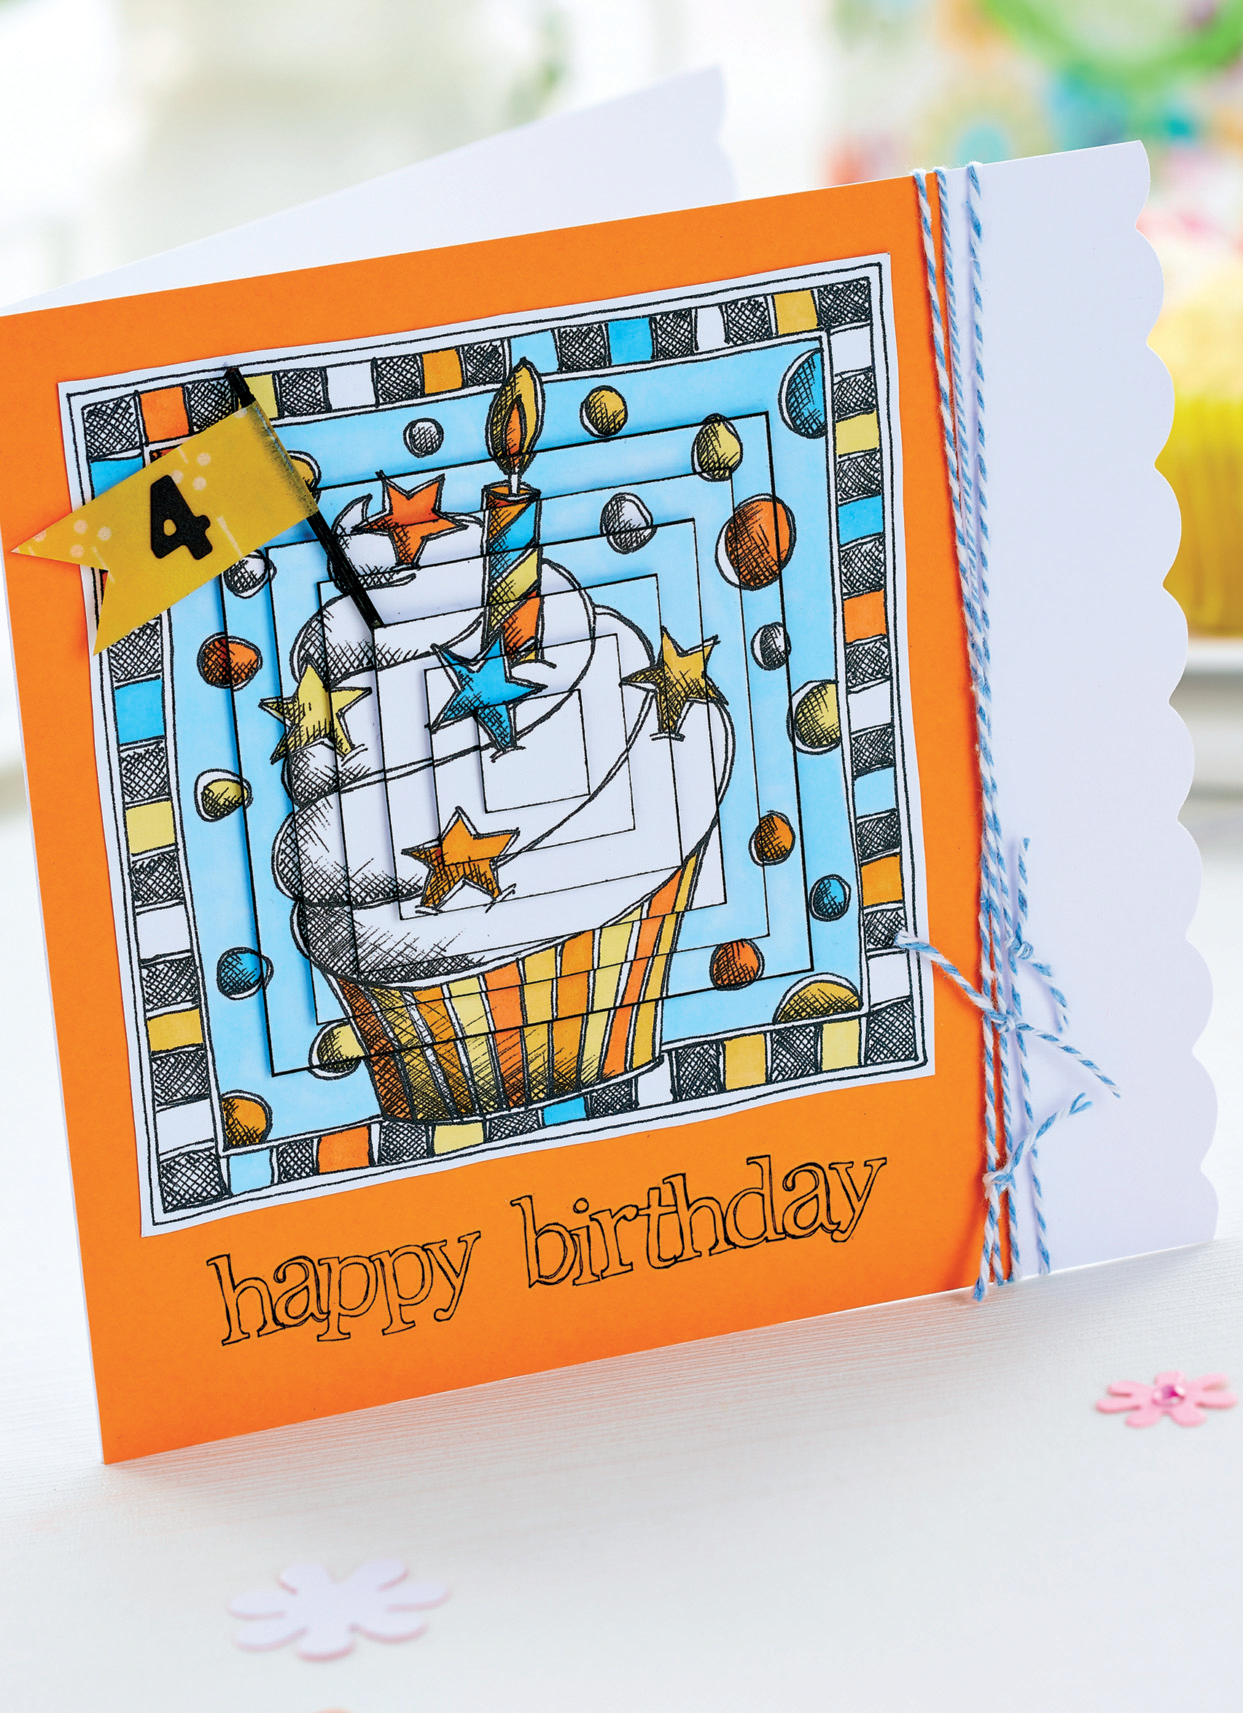
Absolutely. Follow our step-by-step below to make a zingy birthday greeting. Our designer Colette Smith has created a simple design for this tutorial, which is easy to replicate if you’ve never tried pyramage before. Coloured in with bright, cheery shades, it makes a perfect card for a child’s birthday whatever the age.
You Will Need
Cardstock: digital; Craftwork Cards Brilliant White Ultra Smooth; bright orange
Blank, square scallop-edged, white
Pens, ProMarkers: blues, oranges, yellows, black
Washi tape, yellow
Baker’s twine, pale blue
Cocktail stick, point removed
Adhesives
Printer
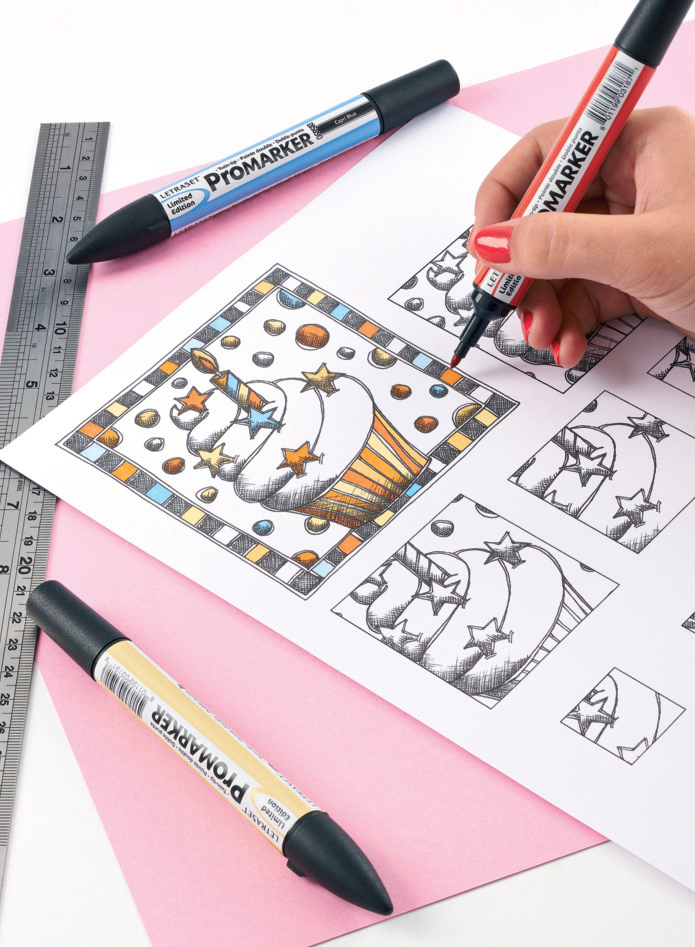
1. Download the main cupcake image, and print onto white digital cardstock. Use the pens to colour in the main image in a selection of colours.
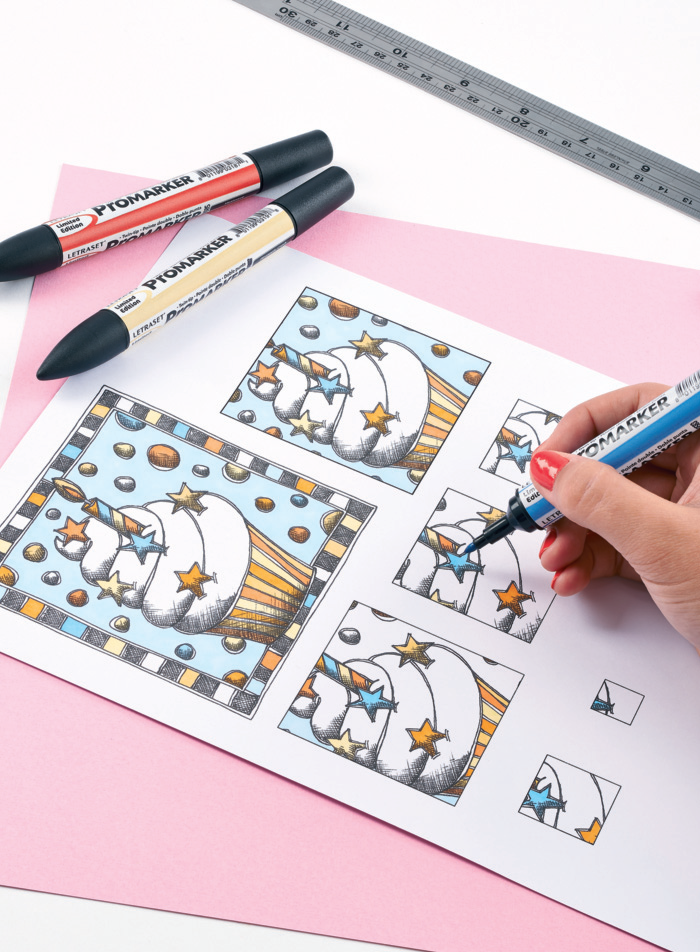
2. Using our photo as a guide, colour in all the layers with the pens, making sure that they correspond with the main image.
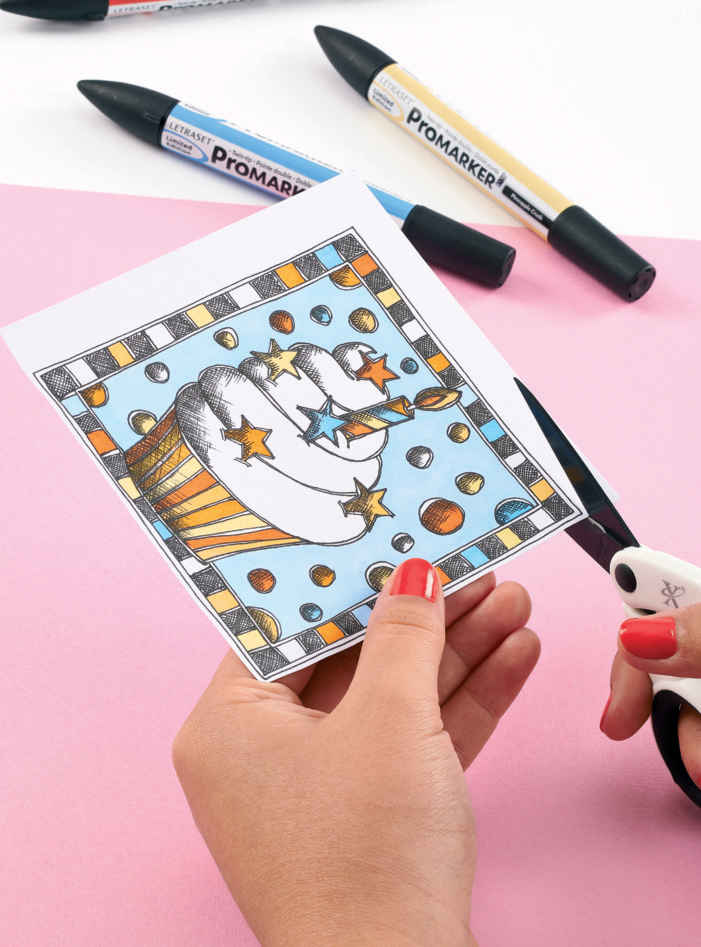
3. Following the wavy outline of the main image, cut it out with scissors ensuring you leave a narrow border around the edge.
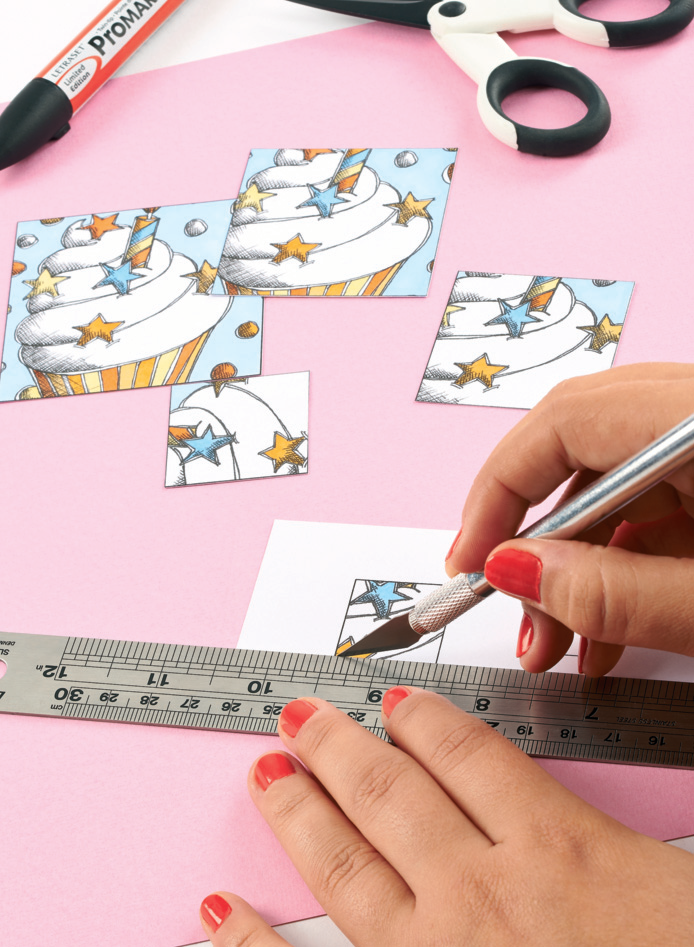
4. Use a sharp craft knife and a metal ruler to carefully cut out the layers – cutting right up to the black outlines.
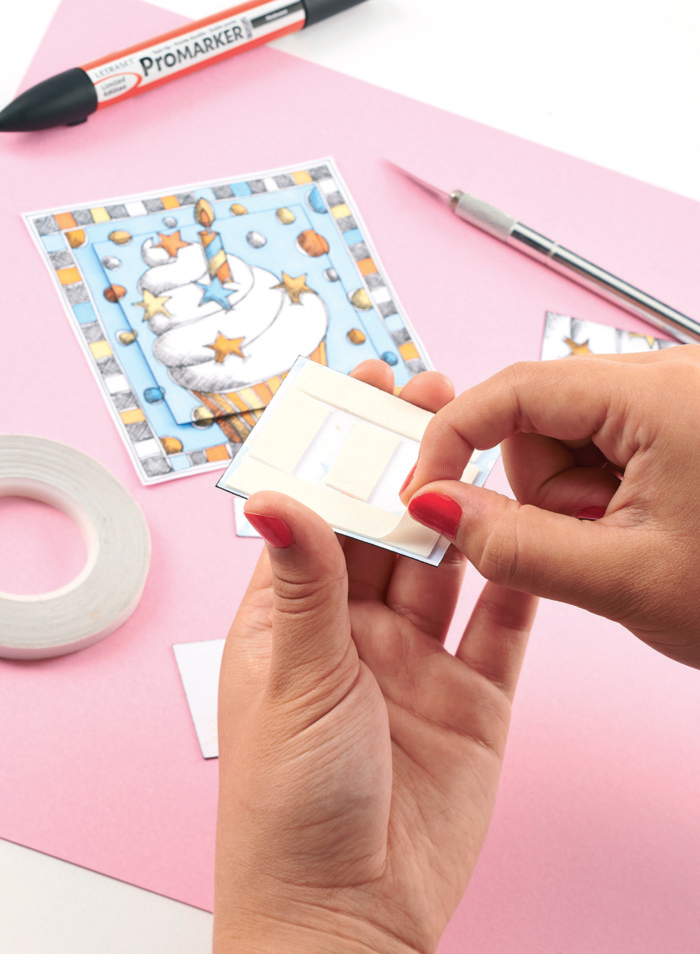
5. Apply foam tape to the reverse of the largest layer, making sure it lines up perfectly with the main image underneath. Repeat with the remaining layers.
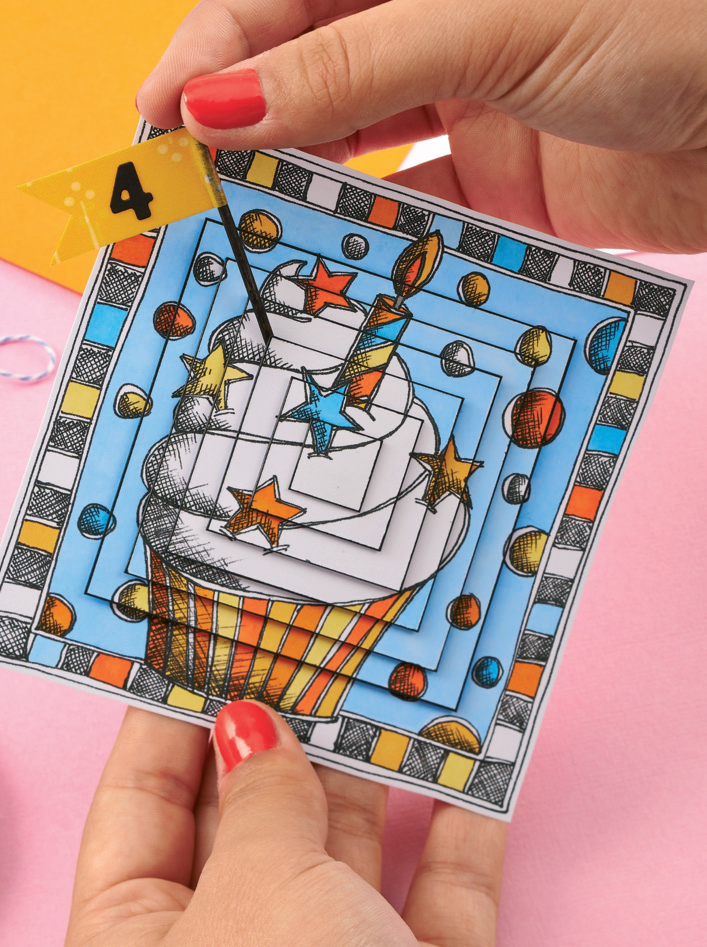
6. Make a flag with the cocktail stick and washi tape. Add a number and fix to the image. Trim the top and bottom edges from the blank; cover the left with orange card and matt the image onto it. Finish with a sentiment and twine.
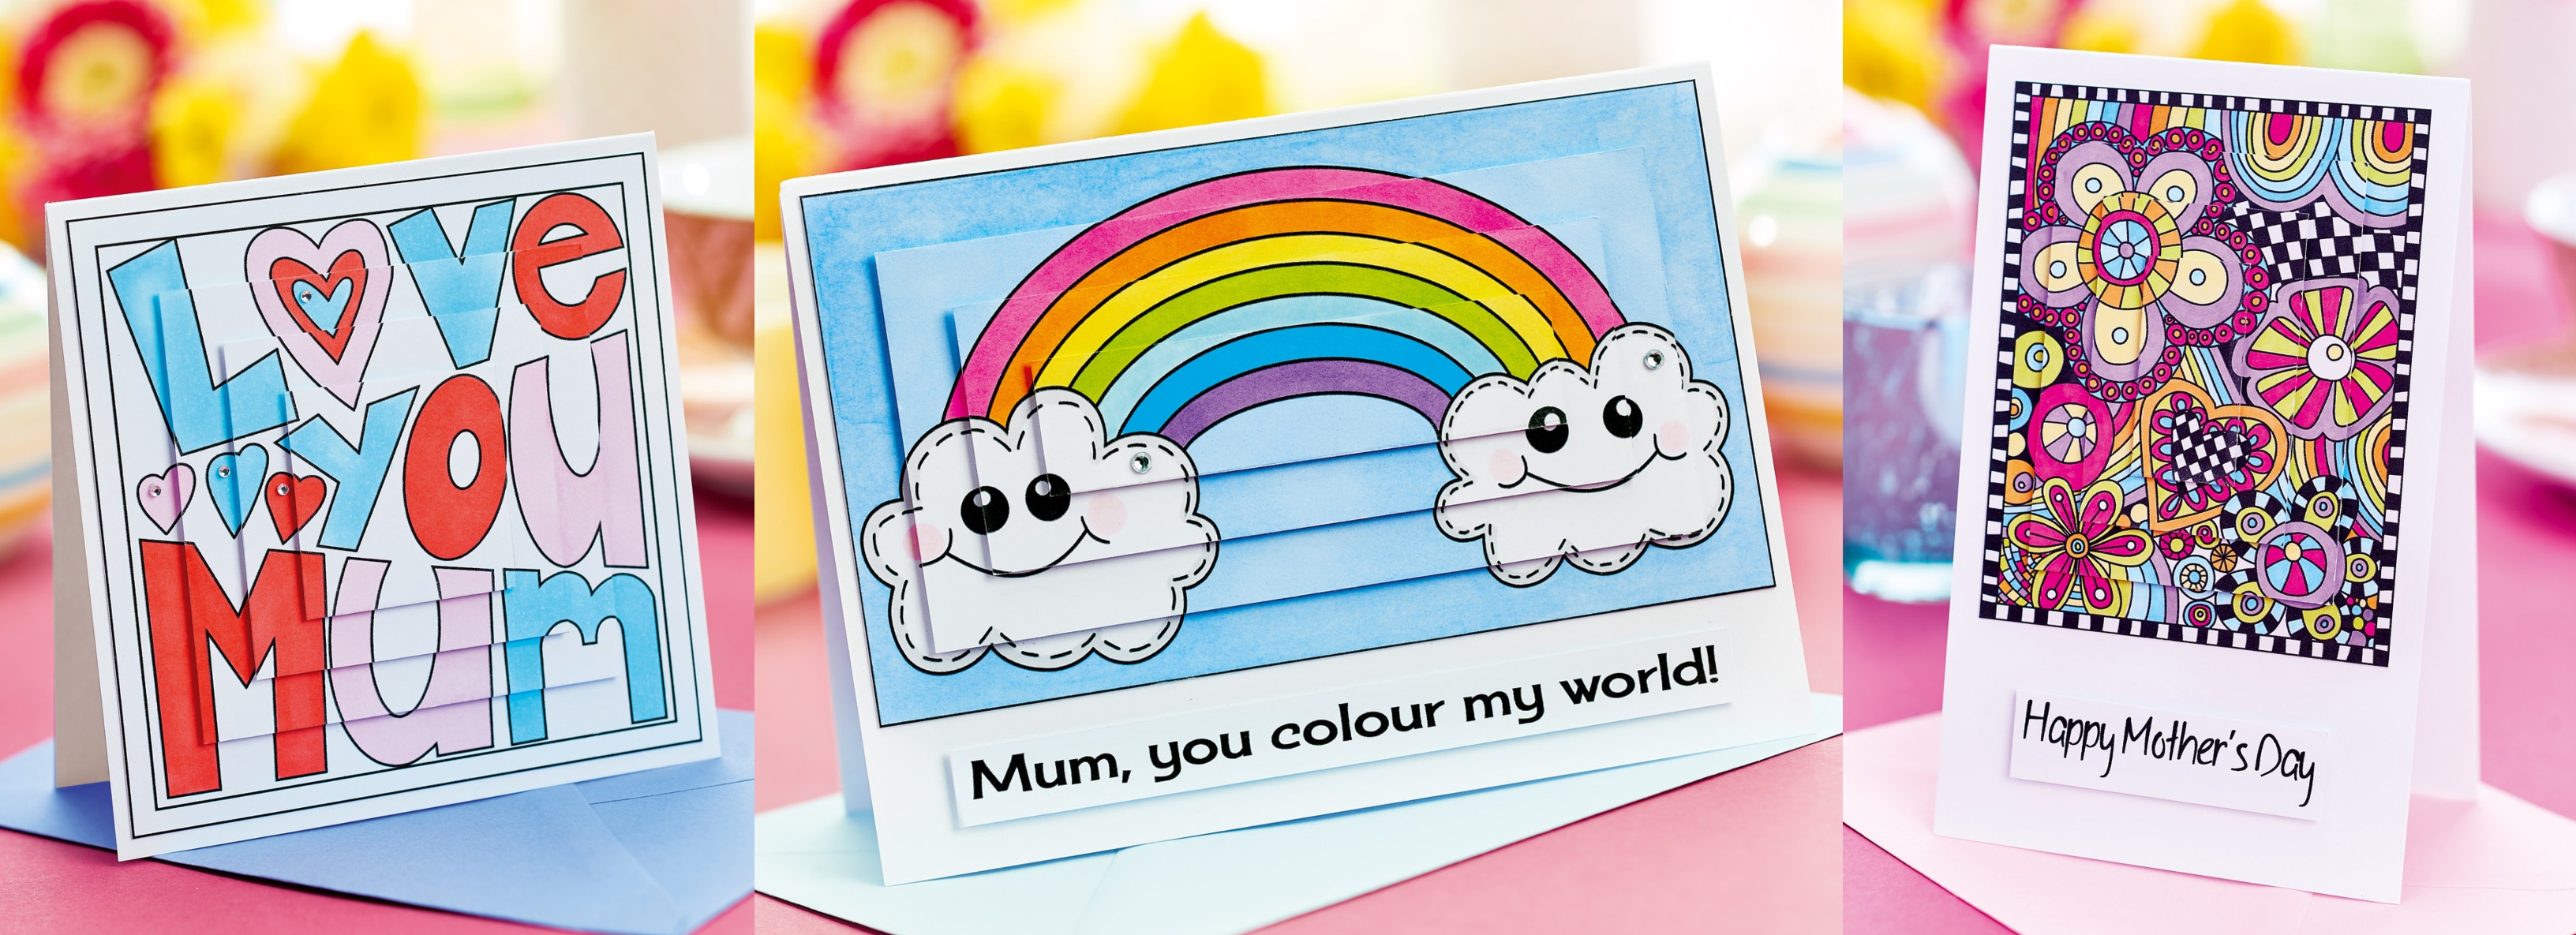
BONUS PROJECT
Enjoy this three-in-one masterclass for Mother’s Day cards – download the project here.