


Card making Papercraft Papercrafter Techniques Card Making
Hide a secret gift beneath a greeting in this simple and savvy project. Why not try tucking a velvet cushion into the tray to surprise them with a necklace when they slide it open? This project is fabulous to turn to whenever you want to create something that little bit more special, in only nine steps!
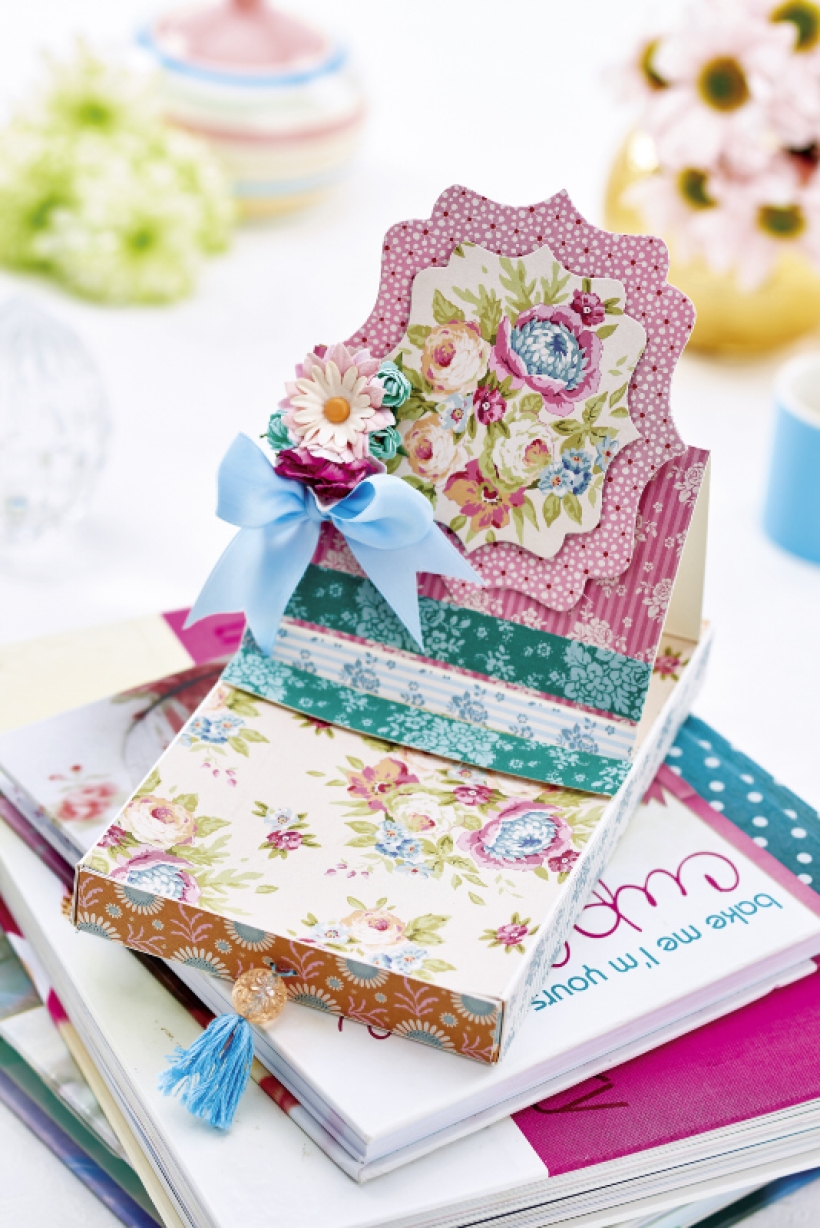
Craft stash essentials, ornate label dies, beaded tassel, floral rosette
• Score a 15cm x 21cm rectangle of card, 2cm from all edges. Cut the tabs and fold along all score lines

• Keep the card flat to cover the outer side with patterned paper. Assemble the tray by glueing the corner tabs to the inside flaps

• Punch two small holes in the front of the tray and thread a beaded tassel through them

• Score a 17cm x 30cm card panel to make a central rectangle measuring 11cm. Score and fold up 2.2cm each side

• Cover each side of the outer cover with patterned paper. Wrap around the tray and glue the overlap on the bottom

• Score and crease an 11cm x 17cm card through the central fold and again, 1cm from each end

• Decorate all panels, turn the card around and fix one 1cm tab along the back of the tray cover so it stands up

• Die cut and layer two ornate labels. Stick this and a rosette to the front fold to pop up as the element is stood up

• Cut a 1.5cm x 11cm strip from patterned paper and adhere across the base with foam pads


Busy lives often involve a lot of memos and reminders, and it can sometimes be hard to keep track. Luckily, we’ve got a sophisticated solution to keep your desk tidy and…

If you’re having a quiet Valentine’s with your beloved at home this year, make the place look a little more special with a speedy-to-make hearts frieze. Papercrafting doesn’t get much easier than…
Home decor Home decorations How to Papercraft Papercrafter Techniques Projects

1. Using a 3.5cm circle die, cut eight discs from chipboard and sixteen circles from patterned paper. Glue the patterned circles to either side of the discs and punch a…

Craft essentials
1. Cut a 5cm x 15cm strip of double-sided patterned paper and fold in half lengthways. Draw parallel pencil lines at 1.5cm and 2cm from the…


