


Reuse your dies and transform them into stencils
Craft Essentials, Paper pads: Simply Creative 12” x 12” Folk Song, Craftwork Cards 8” x 8” Al Fresco, Xcut A5 die set: Mixed Birds, docrafts Creativity Essentials A5 Clear Background Stamp: Floral Background, Dies: circle, heart, Heart punch, Embossing powder, Clear pigment ink, Ink: yellow, brown, green, navy, black, red, Wooden bunting shapes
Having an array of dies in your crafting arsenal can make for very unique projects, as they can be used with a whole host of materials and techniques. Here I have explored using both simple and more complex shapes to make inking stencils.
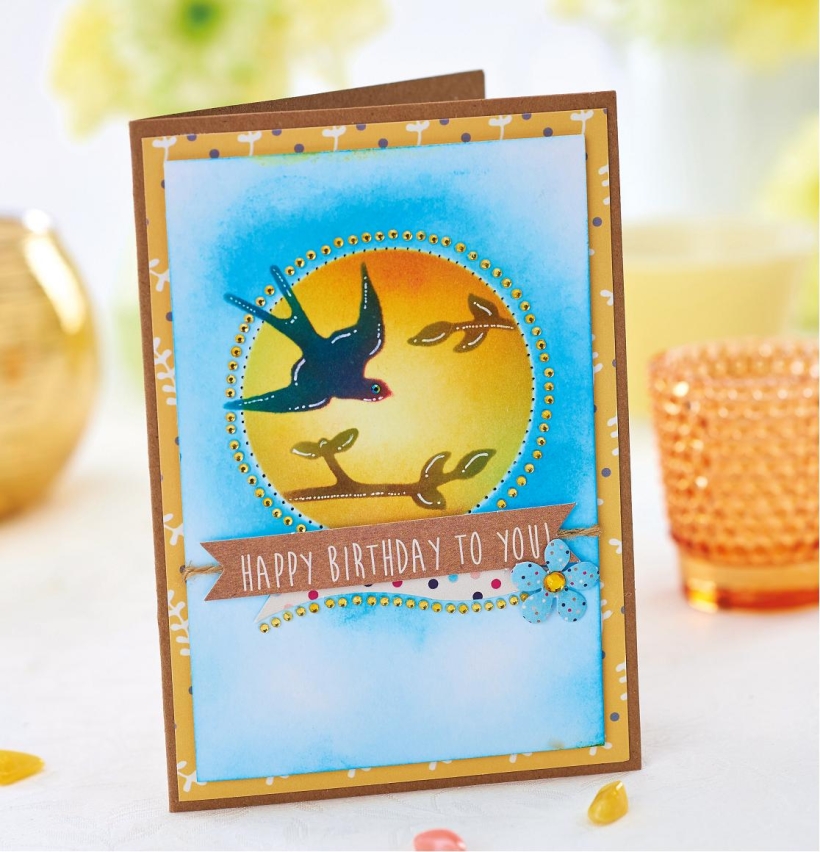
The most basic shapes in your stash are ideal when creating backgrounds. My birthday card (below) is the perfect example of how a simple circle die can make a beautiful sun. Why not use the same technique to show a moon in the night sky? Add texture to your makes by stamping through your stencil too.
Use similar dies to build and layer designs – many dies can be re-used for stencilling techniques, so it’s perfect for the thrifty crafter! It’s also helpful to keep leftover shapes as they can be used as masks when adding overlapping details to your makes.
• Die cut a 6cm circle from a 9cm x 13.5cm panel of card and keep both elements. Fix the outer piece on top of a same-size rectangle of white card.
• Blend yellow ink through the aperture and add orange and pink around the edge.
• Die cut a branch shape from card and place the outer piece on the inked sun. Add colour to the branch aperature with brown and green ink. Repeat on the top right of the circle.
• Using the leftover shape from step 1, mask the sun and blend blue inks across the remainder of the white card.
• Die cut a swallow from card and use the aperature left behind to create a bird in navy, black and red ink. Tie string around your greeting and add a punched paper flower.
• Cover a 10.5cm x 11cm blank with patterned paper, then attach your stamped panel with 3D foam pads. Pierce a border around the sun and embellish with gold gems and a sentiment.
• Die cut a 10.5cm heart from card and place the negative element onto a 11cm x 12.5cm piece of patterned paper.

• Stamp a floral background through the stencil using clear pigment ink, then heat emboss with clear powder.
• Blend yellow, orange and red ink in the shape your stencil has created. Use a damp brush to paint green ink onto the leaves.
• Remove the stencil and wipe your embossed design to remove any ink residue. Matt the panel onto a 11.5cm x 13cm piece of pink card, leaving a narrow border. Layer this onto a 12cm x 13.5cm tentfold blank.
• Add a printed greeting to your design and stick wooden bunting across the base. Embellish with paper blooms and punched hearts.

Busy lives often involve a lot of memos and reminders, and it can sometimes be hard to keep track. Luckily, we’ve got a sophisticated solution to keep your desk tidy and…

If you’re having a quiet Valentine’s with your beloved at home this year, make the place look a little more special with a speedy-to-make hearts frieze. Papercrafting doesn’t get much easier than…
Home decor Home decorations How to Papercraft Papercrafter Techniques Projects

1. Using a 3.5cm circle die, cut eight discs from chipboard and sixteen circles from patterned paper. Glue the patterned circles to either side of the discs and punch a…

Craft essentials
1. Cut a 5cm x 15cm strip of double-sided patterned paper and fold in half lengthways. Draw parallel pencil lines at 1.5cm and 2cm from the…


